Easy Vegan Condensed Milk Recipe
- Time: Active 5 mins, Passive 45 mins, Total 50 mins
- Flavor/Texture Hook: Glossy, buttery, and deeply sweet
- Perfect for: Holiday baking, Vietnamese coffee, or dairy-free fudge
- The Ultimate Homemade Vegan Condensed Milk Recipe
- Why This Slow Reduction Technique Works
- Essential Specs for Success
- Key Ingredients and Smart Substitutes
- Essential Tools for Smooth Success
- Simple Steps to Velvety Milk
- Fixes for Common Texture Problems
- Variations for Every Dietary Need
- Myths About Plant Based Reductions
- Storing and Keeping Milk Fresh
- Smart Ways to Use It
- Recipe FAQs
- 📝 Recipe Card
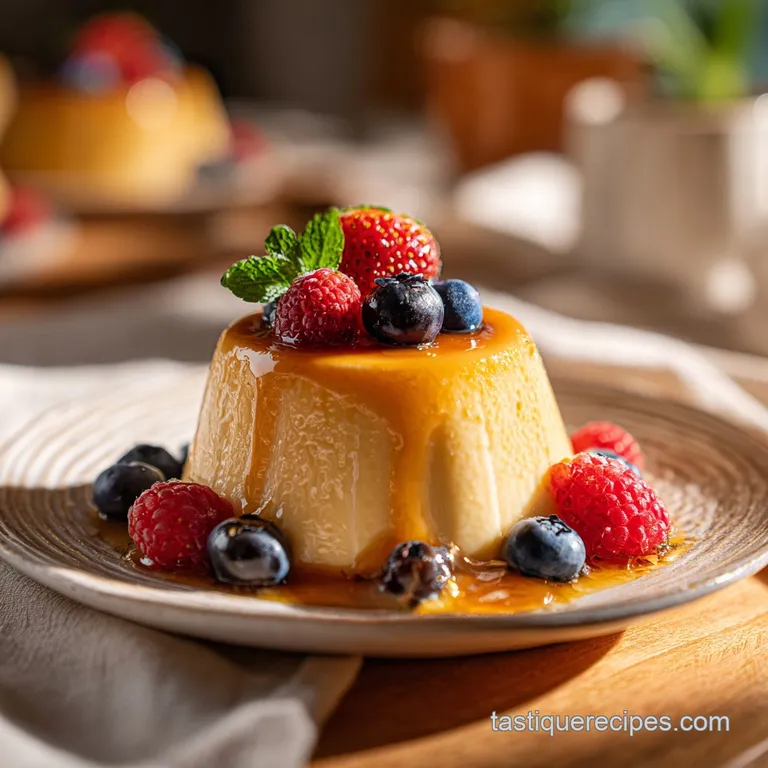
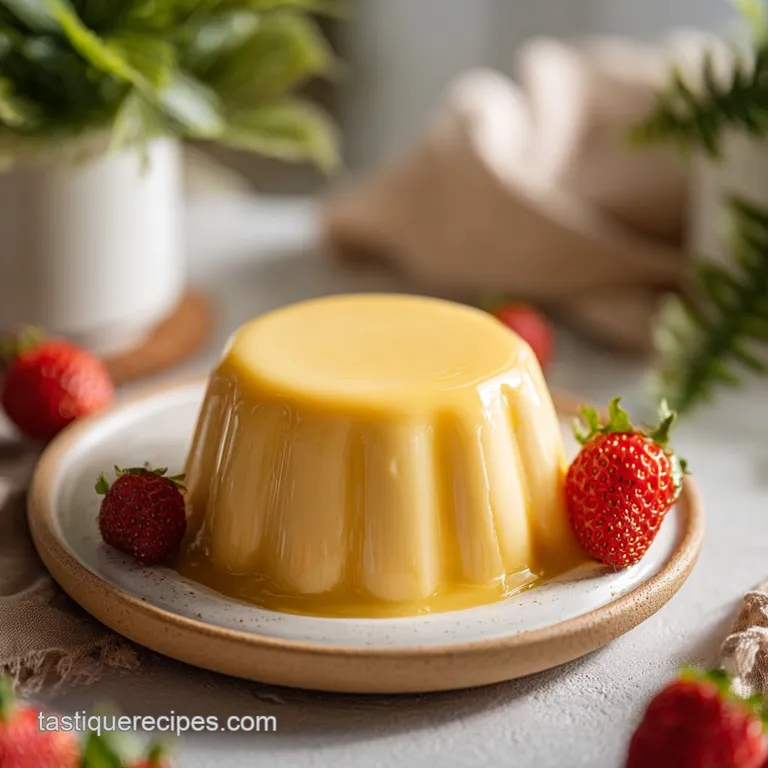
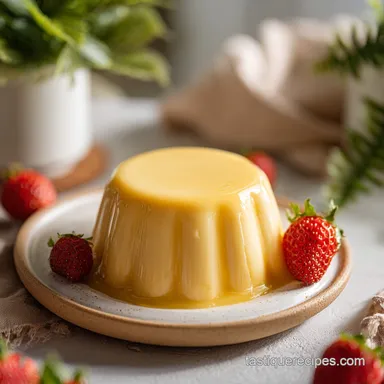
The Ultimate Homemade Vegan Condensed Milk Recipe
The smell of sugar slowly caramelizing into coconut milk is something you never forget. It starts as a faint, tropical breeze and ends with this deep, buttery aroma that fills every corner of the kitchen.
I remember the first time I tried making a dairy-free pumpkin pie for a potluck and the filling just wouldn't set because the store-bought vegan milk I used was too thin. It was a total disaster, but it forced me to figure out how to do it myself.
Now, I never buy the canned stuff. This vegan condensed milk recipe is one of those back pocket tricks that makes you feel like a pro even though you're mostly just watching a pot simmer. It's thick, it's rich, and it has that specific "cling" to the spoon that you need for real deal baking.
Plus, it doesn't have that weird metallic aftertaste you sometimes get from shelf stable cans.
We're going to use just three ingredients, but the magic is all in the patience. If you've ever felt like plant based baking was missing that heavy, decadent mouthfeel, this is the solution.
It's a high protein vegan base if you use the right milk, but today we're focusing on the classic, ultra creamy coconut version that works in every single dessert.
Why This Slow Reduction Technique Works
- Thermal Evaporation: Slow heating removes roughly 60% of the water content from the milk, leaving behind concentrated solids.
- Sugar Saturation: As water leaves, the sugar concentration increases, creating a shelf stable syrup through osmotic pressure.
- Fat Emulsification: Gentle simmering prevents the coconut fats from separating, keeping the final texture silky rather than oily.
- Maillard Reaction: Though subtle, the low heat develops complex flavor compounds between the plant proteins and sugars.
| Base Choice | Prep Time | Texture Result | Best For |
|---|---|---|---|
| Canned Coconut | 45 mins | Ultra thick, buttery | Fudge, Pies, Coffee |
| Oat Milk | 60 mins | Neutral, slightly thinner | Caramel sauce, Tea |
| Soy Milk | 50 mins | High protein, creamy | Custards, Curds |
Choosing the right base depends entirely on your flavor preference. While coconut is the most reliable for thickness, oat milk is a fantastic nut free alternative if you have a little extra time to let it reduce.
Essential Specs for Success
| Component | Role | Pro Secret |
|---|---|---|
| Full fat Coconut Milk | Provides the creamy structure | Never use "lite" or carton milk; it won't thicken properly. |
| Organic Cane Sugar | Adds sweetness and viscosity | Whisk it in while the milk is cold to prevent clumping. |
| Sea Salt | Balances the intense sugar | A tiny pinch "wakes up" the coconut flavor without making it salty. |
Getting the specs right is the difference between a runny mess and a professional grade syrup. If you're looking for something savory to balance out all this sweetness later, you might want to try my Vegan Japanese Curry recipe for dinner.
Key Ingredients and Smart Substitutes
- 1 can (400ml) full fat canned coconut milk: Use the kind with the most fat on the label. Why this? The high fat content ensures a velvety, thick finish after reduction.
- Substitute: Full fat oat milk (canned) works but takes 15 minutes longer to reduce.
- 100g organic cane sugar: This provides the classic golden hue. Why this? It dissolves cleanly and creates a stable syrup structure.
- Substitute: Coconut sugar works for a darker, caramel like flavor, though it will look more like dulce de leche.
- 1 pinch sea salt: Just enough to cut through the richness. Why this? It highlights the floral notes of the coconut.
- Substitute: Standard table salt is fine, just use a tiny bit less.
Essential Tools for Smooth Success
You don't need a lot of fancy gear, but a heavy bottomed saucepan is non negotiable here. Thin pots have "hot spots" that will scorch the sugar before the milk has a chance to reduce. A silicone spatula is also much better than a spoon because you can scrape every bit of the thickening milk off the sides of the pan.
I also recommend a wide pan rather than a deep, narrow one. More surface area means faster evaporation, which can save you ten minutes of standing over the stove. If you have a kitchen scale, use it for the sugar. 100g is precise, and baking is all about precision.
Simple Steps to Velvety Milk
- Combine ingredients. Pour 1 can (400ml) coconut milk into a heavy bottomed saucepan and add 100g organic cane sugar. Note: Mixing while cold prevents the sugar from seizing.
- Dissolve sugar. Heat the mixture over medium heat, stirring constantly until the sugar grains are no longer visible.
- Initiate simmer. Bring the liquid to a very gentle simmer until tiny bubbles break the surface.
- Reduce heat. Drop the temperature to the lowest setting possible to maintain that "lazy" bubble.
- Simmer steady. Let the milk cook for 45 minutes without a lid.
- Scrape sides. Every 10 minutes, use a spatula to scrape down the sides until the buildup is re incorporated.
- Check volume. Watch the pot until the liquid has reduced by half and looks darker.
- The spoon test. Dip a cold metal spoon into the mix; it's ready until it coats the back thickly without running off immediately.
- Finish seasoning. Remove from heat and stir in 1 pinch sea salt.
- Cool completely. Transfer to a glass jar and let it sit at room temperature. Note: It will thicken significantly as it cools.
Fixes for Common Texture Problems
Fixing Grainy or Sandy Textures
Sometimes the sugar doesn't fully integrate, or it crystallizes as it cools. This usually happens if the heat was too high or if you didn't stir enough at the beginning. If it feels sandy on your tongue, don't throw it out.
You can often fix this by gently reheating it with a tablespoon of water and whisking vigorously.
Signs the Reduction is Finished
The biggest mistake is stopping too early. Because the milk is hot, it will always look thinner in the pan than it will in the jar. Look for a change in color from bright white to an off white or pale cream.
If you're worried about the thickness, put a small plate in the freezer for five minutes, drop a bit of the hot milk on it, and see how it sets.
| Problem | Root Cause | Solution |
|---|---|---|
| Too Thin | Not enough evaporation | Simmer for another 10-15 mins on low heat |
| Burnt Bottom | Heat was too high | Transfer to a new pot immediately; do not scrape the burnt bits |
| Separated Oil | Mixture boiled too hard | Whisk in 1 tsp of warm water to re emulsify |
Common Mistakes Checklist ✓ Never cover the pot with a lid (prevents water from escaping). ✓ Use a whisk if you see any clumps forming in the first 5 minutes. ✓ Avoid high heat; a "rolling boil" will split the coconut fat.
✓ Let the milk cool to room temperature before putting it in the fridge. ✓ Use a clean, dry glass jar for storage to prevent spoilage.
Variations for Every Dietary Need
If you want to scale this down for a single serving of coffee, you can halve the recipe easily. Just use a very small pot so the liquid doesn't evaporate too fast and burn. For doubling the recipe, I recommend using two separate pans rather than one giant one.
When you double the volume in one pot, the steam struggles to escape the center, and you'll end up simmering for two hours instead of 45 minutes.
For a keto friendly version, you can swap the cane sugar for an erythritol/monk fruit blend. Just be aware that these sweeteners can sometimes crystallize more aggressively once chilled, so you might need to give the jar a quick shake before using it. This milk is so versatile that you can even drizzle it over a batch of Vegan Chex Mix recipe for a sweet and salty holiday snack.
Myths About Plant Based Reductions
One big myth is that you can't make this without coconut. That's totally wrong. While coconut is the easiest because of the fat, you can use high fat cashew milk or soy milk too. You just have to be more careful with the heat since those milks scorch more easily than coconut.
Another thing people say is that you need to stir it constantly for 45 minutes. Please, don't do that to yourself. You only need to stir every 10 minutes or so to make sure the bottom isn't catching and to scrape the sides.
Constant stirring actually lowers the temperature of the liquid and makes the process take much longer.
Storing and Keeping Milk Fresh
Store your finished milk in an airtight glass jar in the refrigerator. It will stay fresh for up to 14 days. If it gets too hard to pour after being in the fridge, just set the jar in a bowl of warm water for a few minutes.
I don't recommend freezing it because the texture can become a bit grainy when it thaws, though it's still perfectly fine for baking where it will be melted anyway.
To minimize waste, if you have a little bit left in the can before starting, freeze it in an ice cube tray for your next smoothie. Any leftover sugar at the bottom of the bag can be used to make a simple syrup.
If you're into zero waste kitchen habits, you can even save the vanilla bean pods if you used any and stick them in your sugar jar for flavored sugar later.
Smart Ways to Use It
This milk is a total superstar in the kitchen. It's the secret to making a velvety key lime pie or a rich chocolate ganache that doesn't use heavy cream. I love using it as a sweetener for iced tea or drizzling it over fresh berries for a quick dessert.
It also works perfectly as a binder. If you're making homemade granola bars or energy bites, a few tablespoons of this will hold everything together better than maple syrup ever could. It adds a depth of flavor that is truly unique. You can even use it to sweeten the base of a creamy Vegan Congee Recipe if you're going for a sweet breakfast version with mango. Trust me, once you make this once, you'll find a million reasons to keep a jar in your fridge.

Recipe FAQs
What is a vegan substitute for condensed milk?
Full fat canned coconut milk is the best substitute. When reduced slowly over heat, the naturally high fat and solid content concentrates into a thick, sweet syrup.
Have Carnation stopped making vegan condensed milk?
No, but homemade is generally superior for texture. Commercial vegan versions sometimes use stabilizers that don't reduce or bake as richly as true reduced coconut milk.
What is a substitute for 1 can of condensed milk?
Use 1.5 cups of homemade vegan condensed milk. A standard 14oz (400ml) can yields approximately 1 to 1.25 cups after the necessary 45-minute reduction process.
How to mimic sweetened condensed milk?
Simmer full fat coconut milk and sugar until reduced by half. This process concentrates the natural fats and sugars, creating the required velvety texture and dense sweetness.
Is it true I must stir vegan condensed milk constantly while simmering?
No, this is a common misconception. Stirring only every 10 minutes is sufficient to scrape the sides and prevent scorching; constant stirring lowers the temperature unnecessarily.
What is the secret to getting a thick, non-grainy vegan condensed milk?
Use a heavy bottomed pot and maintain a very low, lazy simmer. The low, consistent heat allows for slow water evaporation without burning the sugars, a technique crucial for achieving a smooth texture you’d need for a great Japanese Fruit Sandwich recipe.
Can I use oat milk instead of coconut milk for this recipe?
Yes, you can, but expect a longer reduction time. Oat milk has less natural fat than coconut milk, meaning you must simmer it longer often an extra 15 to 20 minutes to achieve the proper thickness.
Easy Vegan Condensed Milk
Ingredients:
Instructions:
Nutrition Facts:
| Calories | 118 kcal |
|---|---|
| Protein | 0.8 g |
| Fat | 8.5 g |
| Carbs | 11.1 g |
| Fiber | 0 g |
| Sugar | 10.8 g |
| Sodium | 48 mg |
