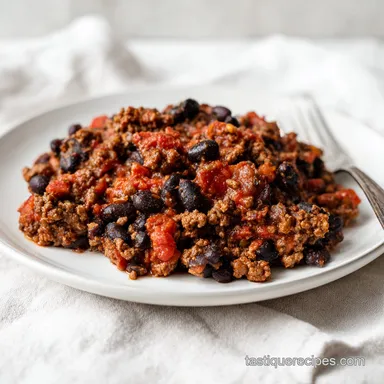
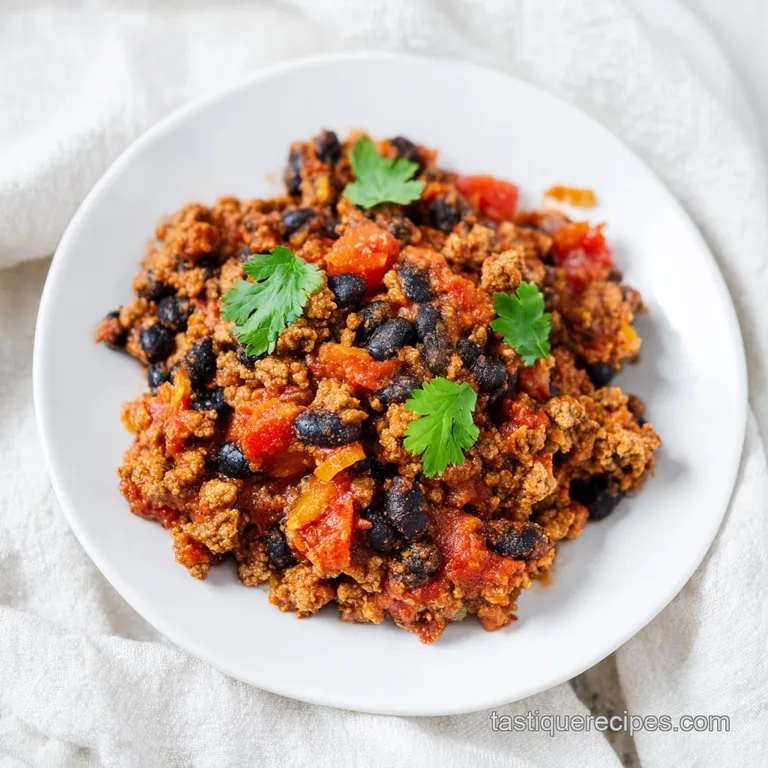
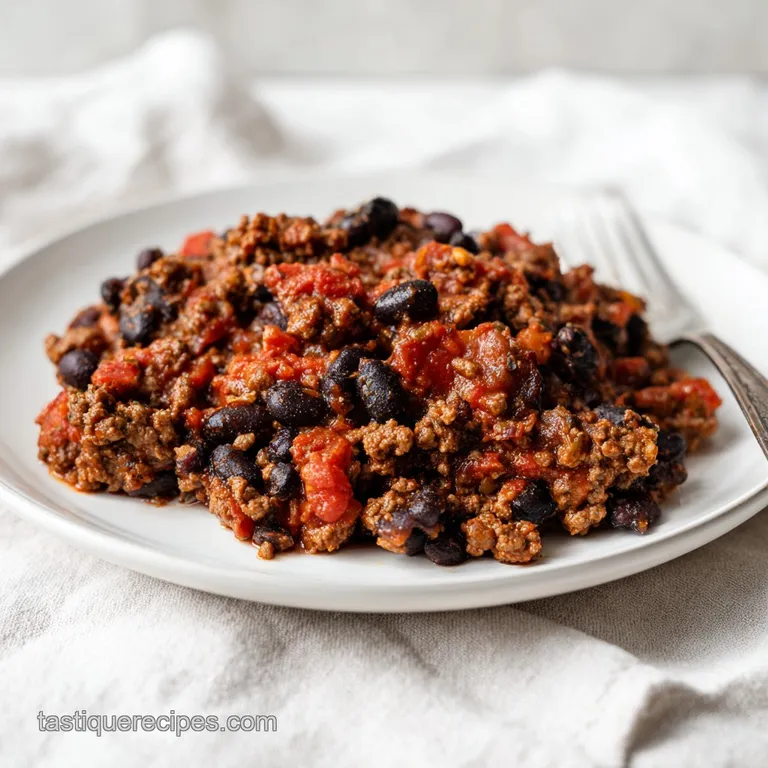
Walking Taco Casserole: Creamy and Hearty
- Time:10 minutes active + 20 minutes baking = Total 30 minutes
- Flavor/Texture Hook: Shatter crisp chips meeting a gooey, zesty cheese blanket
- Perfect for: Game day crowds, lazy Tuesday nights, or beginner cooks
- The Best Walking Taco Casserole
- Why This Bake Works
- Key Ingredient Breakdown
- Tool Kit Needed
- Step By Step Guide
- Fixing Common Mishaps
- Troubleshooting Common Issues
- Smart Dietary Swaps
- Adjusting For Your Crowd
- Busting Kitchen Lies
- Storage And Leftovers
- Great Side Pairings
- Critical Sodium Level
- Recipe FAQs
- 📝 Recipe Card
The scent of toasted cumin and searing beef always takes me back to those chaotic high school football games. I remember the first time I tried "walking tacos" - the ones where you rip open a bag of chips and scoop everything inside. It was a mess, honestly.
I ended up with salsa on my shoes and a chip bag that folded in half, spilling half my dinner on the bleachers.
That disaster is actually what led me to this. I realized that the flavor combo of salty corn chips and zesty taco meat is legendary, but the delivery system is flawed. By moving the whole operation into a baking dish, you get all those textures - the crunch, the creaminess, the melted cheese - without the risk of a wardrobe malfunction.
You can expect a meal that feels like a cheat day but stays surprisingly budget friendly. This Walking Taco Casserole isn't trying to be fancy, it's just trying to be the most satisfying thing on your table. We're talking about a heavy hitting, high protein bake that feeds a crowd without breaking the bank.
The Best Walking Taco Casserole
Right then, let's talk about why this version actually works. I've seen people just throw meat on chips and wonder why they end up with a bowl of corn porridge. The trick is in the layering and the moisture control. We aren't just piling things up; we're creating a barrier.
By simmering the beef and salsa down first, we get rid of the excess water that usually kills the crunch. Then, we add that cream cheese and sour cream mixture. It creates a thick, velvety sauce that clings to the meat rather than soaking into the chips.
It's the difference between a soggy mess and a dish that actually holds its structure.
Trust me on this: don't skip the lime juice. It seems like a small detail, but that hit of acidity cuts through the richness of the cheddar and cream cheese. It wakes up the whole dish and makes the flavors pop.
Plus, using lean ground beef ensures we don't have a pool of orange grease floating on top of our Walking Taco Casserole when it comes out of the oven.
Why This Bake Works
I'm always curious about what's happening in the pan, so I've looked into why these specific steps make a difference. It's not magic, just basic kitchen logic.
- Moisture Reduction: Simmering the salsa and beans for 5 minutes evaporates excess liquid, preventing the chips from turning into mush.
- Fat Barrier: The cream cheese and sour cream create a high fat emulsion that coats the proteins, acting as a shield for the chip layer.
- Temperature Sync: Baking at 375°F (190°C) is the sweet spot where the cheese melts and bubbles without burning the corn chips.
- Acid Balance: Lime juice lowers the pH of the creamy binder, brightening the heavy fats of the dairy.
Since we're going for a budget smart approach, you have to decide if you want the "premium" experience or the "smart" save. Most of the time, the budget version tastes just as good if you handle the seasoning correctly.
| Premium Choice | Budget Alternative | Impact | Savings |
|---|---|---|---|
| Fresh Ground Chuck | 90% Lean Beef | Less grease, easier cleanup | Moderate |
| Name Brand Chips | Store Brand Corn Chips | Slightly less salt, same crunch | High |
| Fresh Grated Cheddar | Pre shredded Blend | Melts slightly slower | Low |
| Organic Black Beans | Canned Black Beans | Much faster prep, similar taste | Moderate |
The biggest trade off here is the cheese. Freshly grated cheese melts into a smoother pool, while pre shredded stuff has potato starch to prevent clumping. It still works for a Walking Taco Casserole, but you might see a bit more "grain" in the melt.
Key Ingredient Breakdown
When you're looking at the list, it's easy to think some items are optional. They aren't. Each one plays a specific role in the texture and taste.
| Ingredient | Science Role | Pro Secret |
|---|---|---|
| Cream Cheese | Structural Binder | Use it at room temp to avoid lumps in the sauce |
| Lean Ground Beef | Protein Base | Brown it deeply for more savory depth |
| Corn Chips | Textural Contrast | Use Fritos for a saltier, sturdier base |
| Lime Juice | Flavor Brightener | Squeeze fresh for a punchier citrus hit |
I once tried using Greek yogurt instead of sour cream to be "healthy." It worked, but the tang was too aggressive and it released too much water during baking. Stick to the sour cream for that classic, velvety mouthfeel. If you're looking for other high protein options, my Crack Chicken Tacos use a similar creamy profile that's a huge hit.
Tool Kit Needed
You don't need a professional kitchen for this. A couple of basic pieces of gear will do the job.
- 12 inch skillet: Essential for browning the beef without crowding the pan (which causes steaming instead of searing).
- 9x13 inch baking dish: The gold standard for casseroles. Glass or ceramic works best for even heat.
- Medium mixing bowl: Where the creamy binder magic happens.
- Sturdy spatula: For folding the meat into the cheese.
- Whisk or fork: To get the cream cheese and sour cream completely smooth.
Let's crack on to the actual cooking. Remember, we're aiming for a specific look and feel at each stage.
Step by step Guide
This is where it all comes together. Keep an eye on the cues - the smell and the sound are just as important as the timer.
Phase 1: Searing and Seasoning
- Heat olive oil in a 12 inch skillet over medium high heat. Add the ground beef and diced onion, cooking until the meat is browned and the onions are translucent. Note: Don't stir too often; let the beef sear to get a deep brown color.
- Stir in the taco seasoning and simmer for 2 minutes until the spices smell toasted and fragrant.
- Pour in the salsa and black beans, simmering for another 5 minutes until the liquid reduces and the sauce looks thick and glossy.
Phase 2: Creating the Creamy Base
- In a separate bowl, whip together the softened cream cheese, sour cream, and lime juice until the mixture is velvety and smooth. Note: If the cream cheese is too cold, you'll have white lumps in your Walking Taco Casserole.
- Fold the cooked taco meat mixture into the creamy binder, stirring until the beef is fully coated and the color is uniform.
Phase 3: Layering and Baking
- Preheat oven to 375°F (190°C). Spread the chips in an even layer across the bottom of a 9x13 inch baking dish.
- Sprinkle a thin layer of shredded cheddar over the chips, then pour the meat mixture over the cheese and smooth the top. Note: That thin layer of cheese acts as extra insurance against sogginess.
- Top with the remaining shredded cheddar cheese.
- Bake for 15-20 minutes until the edges are bubbling and the cheese has melted into a golden crust.
- Garnish with chopped cilantro and sliced scallions before serving.
Fixing Common Mishaps
Even the best of us mess up. Usually, it's a moisture issue or a temperature slip. Let's get those sorted.
Troubleshooting Common Issues
| Issue | Solution |
|---|---|
| Why Your Base Is Soggy | This usually happens because the salsa wasn't reduced enough or the meat was too fatty. If the liquids don't evaporate in the pan, they migrate straight into the chips. According to [Serious Eats](htt |
| Why the Cheese Didn't Brown | If your cheese is just melted but not golden, your oven rack might be too low. Move the pan to the upper middle rack to get that direct heat from the top element. |
| Why the Flavor Is Flat | Lack of salt or acid. Taco seasoning varies wildly by brand. If it tastes dull, a tiny pinch of salt or an extra squeeze of lime right before serving usually fixes it. |
Common Mistakes Checklist:
- ✓ Forgot to preheat the oven (leads to soggy chips)
- ✓ Used frozen cream cheese (creates lumps)
- ✓ Added toppings before baking (cilantro burns in the oven)
- ✓ Overfilled the pan (causes boil over in the oven)
- ✓ Skipped the onion (loses that essential aromatic base)
Smart Dietary Swaps
I'm usually all about the plant based side of things, and the beauty of a Walking Taco Casserole is how easy it is to flip. You don't have to sacrifice the texture to make it vegan or low carb.
If you want a high protein vegan version, swap the beef for soy crumbles or lentils. For the creamy part, a cashew based cream cheese and vegan sour cream work surprisingly well. Just make sure the vegan cheese you choose is a "meltable" variety, or it'll just sit on top like plastic.
For those avoiding carbs, you can ditch the corn chips entirely. Use a layer of sliced bell peppers or sautéed zucchini rounds. It changes the vibe from a snacky dish to a veggie forward meal. If you're craving something similar but with a different protein, my Pork Mushroom Egg Rolls provide that same satisfying crunch.
| Original Ingredient | Substitute | Why It Works |
|---|---|---|
| Ground Beef (1 lb) | Soy Crumbles (1 lb) | Similar texture. Note: Requires slightly less oil for browning |
| Cream Cheese (8 oz) | Tofu Ricotta (8 oz) | High protein. Note: Adds a nuttier, milder flavor |
| Corn Chips (6 oz) | Sliced Bell Peppers | Low carb. Note: Adds a fresh, crisp snap instead of saltiness |
| Cheddar Cheese | Nutritional Yeast | Vegan friendly. Note: Provides a cheesy flavor but doesn't melt |
Depending on what you choose, you might need to adjust the salt. Plant based proteins often need a bit more seasoning to match the depth of beef.
Adjusting For Your Crowd
Scaling a casserole isn't as simple as doubling everything. If you just double the volume in the same pan, the middle won't cook and the edges will burn.
Scaling Down (Half Batch): Use an 8x8 inch square pan. Reduce the baking time by about 20%, checking it around the 12 minute mark. If you're using a single egg in any of your variations, beat it first and then use half.
Scaling Up (Double Batch): Don't use a deeper pan; use two 9x13 inch pans. This ensures the chips stay crispy. For the spices, only increase them to 1.5x the original amount. Over seasoning in large batches can lead to a salt bomb.
Also, lower the oven temp by 25°F (to about 165°C) and extend the bake time by 5-10 minutes to ensure the center is hot.
If you're feeding a massive group, work in batches for the meat. Crowding the skillet will make the beef steam in its own juices, and you'll lose that essential sear.
Busting Kitchen Lies
There are a few things people tell you about taco bakes that just aren't true. Let's set the record straight.
"Searing the beef seals in the juices." This is a classic myth. Searing doesn't "seal" anything; moisture escapes regardless. However, it creates a brown crust that adds a massive amount of savory flavor. We sear for the taste, not to keep the meat "juicy."
"low-fat cheese is a great substitute." Honestly, don't even bother. low-fat cheeses often contain more fillers and water, which means they don't melt smoothly and can actually make your Walking Taco Casserole soggy. Stick to full fat sharp cheddar for the best results.
"You need to pre toast the chips." Some people suggest putting the chips in the oven first. It's a waste of time. The chips are already fried and toasted; they just need to be heated through and fused with the cheese.
Storage And Leftovers
Once the party is over, you'll likely have some left. Here is how to handle it without losing the soul of the dish.
Fridge Storage: Keep leftovers in an airtight container for 3-4 days. The chips will inevitably soften, but the flavor stays great.
Freezing Tips: You can freeze the meat and cheese mixture (without the chips) for up to 2 months. When you're ready to eat, thaw it in the fridge, spread it over fresh chips, and bake. Never freeze the chips themselves, or they'll turn into cardboard.
Reheating: Avoid the microwave if you can. It makes the chips rubbery. Instead, pop a portion into a toaster oven or air fryer at 350°F (175°C) for 5-8 minutes. This helps bring back some of the shatter crisp texture.
Zero Waste Ideas: Don't toss those onion skins or the stems of your cilantro. Throw the onion skins into a freezer bag for your next homemade vegetable stock. The cilantro stems are actually packed with more flavor than the leaves - chop them finely and sauté them with the beef at the beginning for an extra layer of taste.
Great Side Pairings
Since this Walking Taco Casserole is quite rich and heavy, you need something to balance it out. Think fresh, acidic, and light.
A crisp cabbage slaw with a lime vinegar dressing is the best bet. The crunch of the raw cabbage and the sharpness of the vinegar cut through the velvetiness of the cream cheese. A side of sliced avocado or a simple corn salad with diced tomatoes and red onion also works wonders.
For a drink, something sparkling is key. A lime seltzer or a classic margarita cleanses the palate between bites. If you're looking for a non alcoholic option, a cold hibiscus tea provides a tart contrast that keeps the meal from feeling too heavy.
According to USDA FoodData, adding a side of fresh greens significantly increases the fiber content of the meal, making this high protein bake feel a bit more balanced. Keep the sides simple and let the casserole be the star of the show.
Critical Sodium Level
1150 mg 1,150 mg of sodium per serving (50% 50% of daily value)
The American Heart Association recommends a daily sodium limit of 2,300 mg, with an ideal limit of 1,500 mg for most adults to reduce the risk of cardiovascular disease.
Tips to Reduce Sodium
-
Swap Taco Seasoning-30%
Replace the store-bought taco seasoning with a homemade blend of chili powder, cumin, paprika, and garlic powder to avoid hidden salts.
-
Switch the Chips-25%
Substitute Fritos or Doritos with unsalted corn tortilla chips or baked homemade chips to remove highly processed sodium.
-
Low-Sodium Salsa-20%
Use a no-salt added chunky salsa or prepare a fresh pico de gallo using raw tomatoes, onions, and lime juice.
-
Better Bean Choice-20%
Opt for no-salt added canned black beans or use dry beans soaked overnight to eliminate the salty canning liquid.
-
Reduce Cheese Volume-15%
Decrease the amount of shredded cheddar or choose a lower sodium variety of hard cheese.
-
Enhance Fresh Flavors
Increase the amount of fresh cilantro, lime juice, and sliced scallions to provide a flavor punch without needing extra salt.
Recipe FAQs
What is a walking taco casserole?
A baked version of a walking taco. It layers seasoned ground beef, beans, and a creamy cheese binder over corn chips and bakes them until bubbly.
What ingredients are needed for a walking taco casserole?
Ground beef, black beans, salsa, and corn chips. These are mixed with taco seasoning, cream cheese, sour cream, lime juice, and shredded sharp cheddar cheese.
Is the walking taco casserole the same as Dolly Parton's five ingredient casserole?
No, they are completely different dishes. While both are comforting, the Dolly Parton casserole typically uses chicken and a different set of seasonings.
Why did my casserole base turn out soggy?
The salsa likely wasn't reduced enough. Ensure you simmer the meat and salsa for 5 minutes until the sauce is thick and glossy before mixing in the creamy binder.
Can I freeze this casserole for later?
Freeze only the meat and cheese mixture. Chips will turn into cardboard if frozen; instead, thaw the meat mixture and spread it over fresh chips before baking.
Why is the cheese melted but not golden brown?
Your oven rack is likely positioned too low. Move the pan to the upper middle rack to expose the cheese to more direct heat from the top element.
How to bake the walking taco casserole?
Bake at 375°F (190°C) for 15-20 minutes. Pull the dish from the oven once the edges are bubbling and the cheese has formed a golden crust.
Walking Taco Casserole