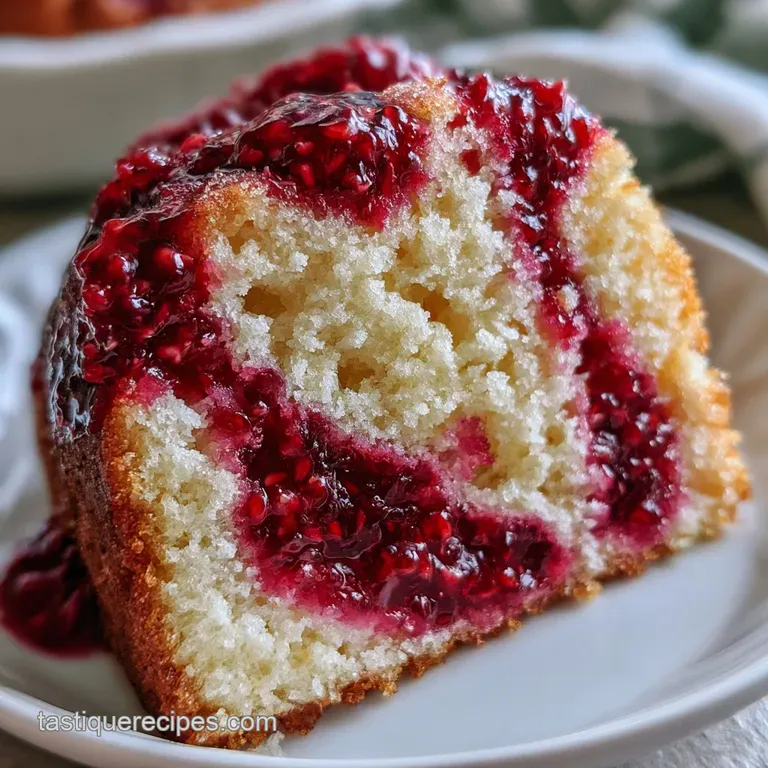
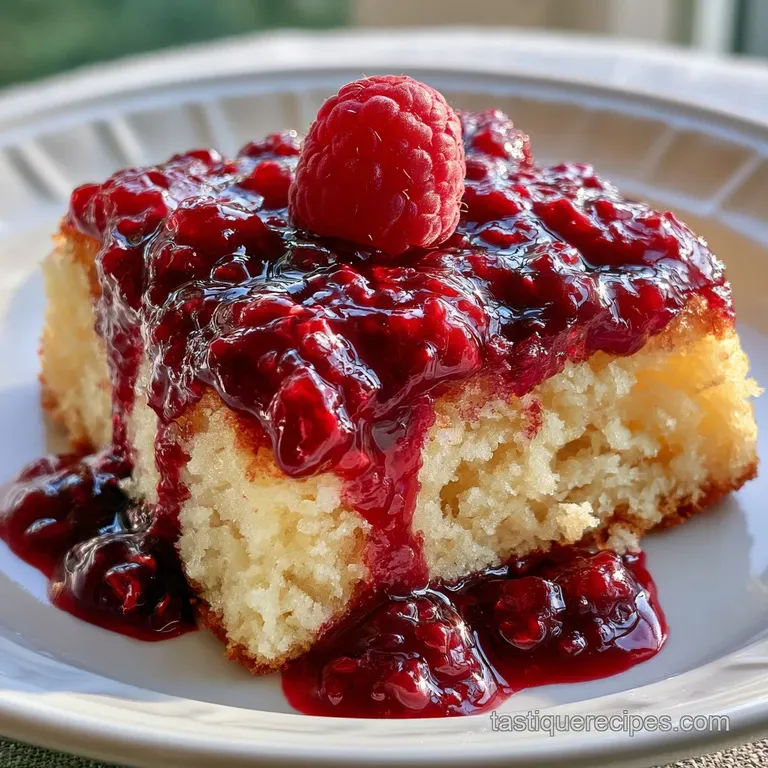
Raspberry Zinger Poke Cake: Tangy and Creamy
- Time: 15 min active + 4 hours 30 mins chilling = Total 4 hours 45 mins
- Flavor/Texture Hook: Tangy raspberry zest with a velvety cream topping
- Perfect for: Summer potlucks or whimsical family desserts
The smell of boiling raspberry gelatin hitting a warm cake is something you never forget. It's that sharp, fruity aroma that fills the kitchen and immediately makes everyone ask what's for dessert. But let me tell you about the time I completely messed this up.
I tried to be "efficient" and used room temperature water for the gelatin instead of boiling it. The result? Instead of a smooth, velvety soak, I had these weird, chewy gelatin beads trapped in the sponge that felt like eating little rubber balloons. It was a total texture nightmare.
That experience taught me that with this kind of dessert, you can't cut corners on the temperature. If the gelatin doesn't fully dissolve, the whole vibe is ruined. I spent the next few weekends tinkering with the soak, testing different sodas and cooling times, until I found the exact balance that gives you that iconic, light as-air feel.
The goal here is to recreate those nostalgia inducing store-bought cakes but with better ingredients and a way more refreshing taste. This raspberry zinger poke cake is all about the contrast: the sweetness of the white cake, the tartness of the raspberry, and the slight chew of the coconut.
Trust me on this, once you get the poking and soaking process right, it's a total crowd pleaser.
Making the Raspberry Zinger Poke Cake
Right then, let's get into why this works. Most cakes are just a sponge and frosting, but a poke cake is basically a hybrid between a cake and a pudding. The "poke" part is essential because it creates channels for the flavor to travel deep into the center, so you aren't just eating a layer of syrup on top of a dry cake.
Carbonation Lift: The bubbles in the Sprite break up the gelatin slightly, creating a lighter, more aerated soak that doesn't feel heavy or gummy.
Thermal Absorption: Pouring hot liquid into a warm cake allows the sponge to absorb the moisture without collapsing, keeping the crumb pillowy.
Fat Barrier: The oil and eggs in the cake mix create a structure that can hold a lot of liquid without turning into actual mush.
Cold Setting: Chilling the cake for several hours allows the gelatin to bond with the cake proteins, locking in the moisture.
Before we dive into the ingredients, it's helpful to see how this compares to a more traditional approach. Most people ask if they can just make a normal raspberry cake, but the texture is completely different.
| Feature | Fast Mix Method | Classic Scratch Method | Result Impact |
|---|---|---|---|
| Base Prep | 5 mins | 30 mins | Mix is more consistent |
| Soak Style | Fizzy/Light | Syrupy/Heavy | Sprite adds a unique lift |
| Frosting | Whipped Topping | Buttercream | Whipped is more refreshing |
Now, let's look at what each part of the recipe is actually doing for the final result.
Component Analysis
| Ingredient | Science Role | Pro Secret |
|---|---|---|
| White Cake Mix | Structural Base | Keeps the raspberry color vibrant |
| Raspberry Gelatin | Flavor & Set | Must be boiling to avoid lumps |
| Sprite | Texture Modifier | Adds a subtle citrus zing |
| Shredded Coconut | Texture Contrast | Toasts lightly if you prefer a nuttier taste |
Gathering Your Essentials
For the base, we're keeping it simple with a mix, but you can definitely use a from scratch white cake if you're feeling fancy. Just make sure it's a sturdy sponge, not a delicate chiffon, or it'll fall apart during the poking phase.
- 1 box (432g) white cake mix Why this? Provides a neutral, sweet canvas for the fruit. (Sub: Homemade white cake batter)
- 1 cup (240ml) water Why this? Standard hydration for the mix. (Sub: Milk for a richer crumb)
- 1/3 cup (75g) vegetable oil Why this? Keeps the cake moist during chilling. (Sub: Melted coconut oil)
- 3 large eggs Why this? Essential for the cake's lift and structure. (Sub: 3 flax eggs for vegan ish, but texture will change)
- 1 package (85g) raspberry gelatin powder Why this? The core flavor and setting agent. (Sub: Strawberry gelatin)
- 1 cup (240ml) boiling water Why this? Fully dissolves the gelatin crystals. (Sub: None, must be boiling)
- 1 cup (240ml) Sprite Why this? Adds lightness and a bit of tang. (Sub: 7 Up or Ginger Ale)
- 8 oz (225g) whipped topping Why this? Light, stable, and doesn't melt as easily. (Sub: Stabilized whipped cream)
- 1 tsp (5ml) vanilla extract Why this? Rounds out the sharp fruit notes. (Sub: Almond extract)
- 1 cup (100g) sweetened shredded coconut Why this? Gives it that "Zinger" look and chew. (Sub: Unsweetened coconut)
Required Kitchen Gear
You don't need a professional kitchen for this, but a few specific tools make it way easier. I personally use a wooden chopstick for the poking because it's the perfect diameter, but a thin handle of a wooden spoon works too.
Just avoid using a knife, as that creates tears in the cake rather than clean holes, which can lead to "pooling" of the liquid.
You'll also want a 9x13 inch baking pan. If you use a glass pan, be careful with the oven temp, as glass can sometimes hold heat longer than metal. I also suggest using a silicone spatula for the whipped topping so you can get those clean, smooth edges. If you're looking for more tips on handling cake batters, this helpful baking guide is a great resource for the basics.
Step by step Assembly
Right then, let's crack on. Follow these steps closely, especially the temperature cues.
- Preheat the oven to 350°F (175°C). Grease a 9x13 inch baking pan and prepare the cake batter according to the package instructions.
- Bake for 25-30 minutes until the top springs back when lightly touched. Allow the cake to cool for 5-10 minutes. Note: Don't let it cool completely or the soak won't penetrate as well.
- Using a wooden chopstick or handle of a wooden spoon, poke holes every 1 inch across the entire surface of the cake, pushing about halfway down.
- Dissolve the raspberry gelatin powder in boiling water, then stir in the Sprite. Note: Stir vigorously until no crystals remain.
- Slowly pour the hot raspberry liquid over the warm cake, ensuring every hole is filled.
- Cover the cake and refrigerate for at least 4 hours, or preferably overnight, until the gelatin is set and feels firm.
- Fold the vanilla extract into the whipped topping and spread the cream evenly over the chilled cake.
- Immediately sprinkle the shredded coconut over the top of the frosting.
Chef's Note: For a more intense raspberry flavor, you can stir in a handful of fresh raspberries into the batter before baking, but make sure to toss them in a bit of flour first so they don't all sink to the bottom.
Solving Common Texture Issues
The most common complaint with a raspberry zinger poke cake is that it can either be too dry or way too soggy. Most of the time, this comes down to the timing of the "poke" and the "chill."
Troubleshooting Common Issues
| Issue | Solution |
|---|---|
| Why Your Cake Is Mushy | If the cake feels like pudding instead of a moist sponge, you likely poked too many holes or didn't let it chill long enough. The gelatin needs time to set into a semi solid state. If you cut into it |
| Why Topping Is Melting | This happens when the cake isn't fully chilled. Even if the gelatin is set, the core of the cake might still be slightly warm, which will melt the whipped topping from the bottom up. |
| Why the Flavor Is Weak | Using a generic store brand gelatin can sometimes lead to a muted taste. Also, if the Sprite is flat, you lose that subtle effervescence that helps the flavor pop. |
Common Mistakes Checklist
- ✓ Did you use boiling water for the gelatin?
- ✓ Did you poke the holes while the cake was still warm?
- ✓ Did you wait at least 4 hours before adding the cream?
- ✓ Did you use a white cake mix for the best color contrast?
Fun Flavor Variations
Once you've mastered the basic version, you can really start playing with the layers. If you want something a bit more decadent, you could try using a classic southern pound cake as the base. It's denser and richer, which makes the light raspberry soak feel even more refreshing.
For those who like a bit of a twist, try replacing the Sprite with ginger ale. The ginger adds a spicy warmth that cuts through the sugar of the raspberry. Or, if you're feeling bold, you could drizzle some miso caramel sauce over the top of the coconut for a salty sweet contrast that is absolutely wild.
Decision Shortcut:
- If you want it tangier: Use a splash of lemon juice in the gelatin.
- If you want it creamier: Fold a bit of cream cheese into the whipped topping.
- If you want it crunchier: Toast the coconut in a pan for 2 minutes before sprinkling.
Storage and Waste Tips
Since this cake uses whipped topping and gelatin, it absolutely must stay in the fridge. You can store it in an airtight container for 3-4 days. According to guidelines from FoodSafety.gov, keeping dairy based toppings chilled is key to avoiding spoilage.
Do not freeze this cake. The gelatin and the whipped topping have different freezing points, and once you thaw it, the texture will be grainy and the layers will separate. It's just not worth the risk.
To keep things zero waste, don't throw away the leftover coconut! If you have a handful left over, toss it into your morning oatmeal or a smoothie. If you have cake scraps from leveling the top, crumble them into a bowl, add a dollop of Greek yogurt and fresh raspberries for a quick "cake parfait" snack.
Serving Your Sweet Treat
When you're ready to serve, use a sharp knife dipped in hot water. This helps you slice through the gelatin and cream without smudging the layers. For a visual feast, Food Network has great ideas on garnishing, but I find that a few fresh raspberries placed on top of the coconut are all you really need.
This dish is best served in small squares, as it's quite rich. It's the kind of dessert that looks impressive but doesn't require you to spend the whole day in the kitchen. Just remember the golden rule: patience with the chilling time is the secret to that velvety finish.
Enjoy your homemade raspberry zinger poke cake!
Recipe FAQs
Is it true I can freeze this cake for later?
No, this is a common misconception. The gelatin and whipped topping have different freezing points, which creates a grainy texture and causes the layers to separate upon thawing.
Why is my poke cake mushy instead of moist?
You likely poked too many holes or didn't chill it long enough. The gelatin requires at least 4 hours to set into a semi solid state to prevent a pudding like consistency.
How to poke the holes correctly?
Use a wooden chopstick or the handle of a wooden spoon. Poke holes every 1 inch across the entire surface, pushing approximately halfway down into the cake.
Why is the whipped topping melting into the cake?
The core of the cake is still too warm. Even if the gelatin appears set, residual internal heat will melt the topping from the bottom up.
Can I replace the gelatin with fresh berries for more flavor?
No, the gelatin is essential for the structure and soak. If you love that sweet tart balance of fresh fruit, see how we use a similar flavor profile in our raspberry lemon dip.
How to prepare the raspberry soak?
Dissolve the raspberry gelatin powder in boiling water first. Once fully dissolved, stir in the Sprite before pouring the hot liquid slowly over the warm cake.
Do I have to refrigerate the cake overnight?
No, but it is highly recommended. While 4 hours is the minimum time needed for the gelatin to set, overnight refrigeration ensures the best final texture.
Raspberry Zinger Poke Cake

