Roasted Cauliflower: Crispy and Caramelized
- Time: Active 10 minutes, Passive 25 minutes, Total 35 minutes
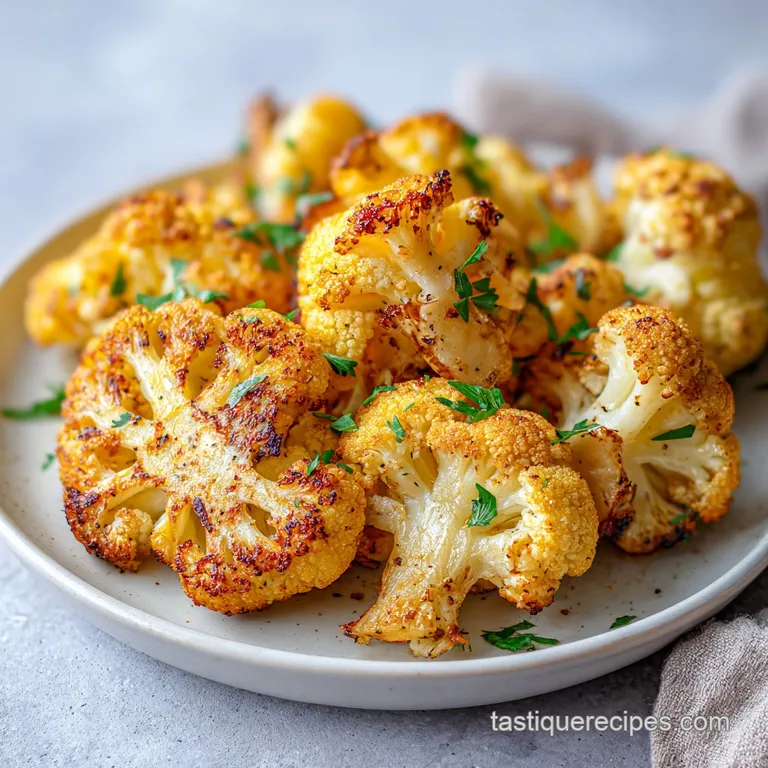
- Flavor/Texture Hook: Smoky, charred edges with a tender, buttery center and a zesty lemon finish.
- Perfect for: budget-friendly weeknight side dishes or a high protein plant based meal base.
- Stop Steaming Your Veggies and Start Achieving Golden Roasted Cauliflower
- The Critical Numbers for Success with Your Roasted Cauliflower
- Selecting the Best Budget Ingredients for Maximum Flavor Impact
- The Essential Kitchen Tools for a Perfect Crispy Texture
- Mastering the Method for Flawless Oven Roasted Cauliflower Results
- Solving Common Texture Issues and Avoiding Mushy Vegetable Results
- Creative Variations Including Air Fryer and Whole Roasted Methods
- Smart Storage Strategies and Zero Waste Ideas for Leftovers
- Delicious Plant Based Pairings to Round Out Your Healthy Meal
- Recipe FAQs
- 📝 Recipe Card
Stop Steaming Your Veggies and Start Achieving Golden Roasted Cauliflower
Did you know that a head of cauliflower is actually a massive cluster of unopened flower buds? It is basically a giant, tightly packed bouquet that is just waiting for enough heat to turn its natural sugars into something magical.
Most people treat this vegetable like it is a chore, boiling it into a flavorless gray mush that smells like a locker room, but we are going to change that today. When you hit those florets with the right amount of fat and high heat, they undergo a total transformation that makes them taste almost like popcorn or toasted nuts.
I remember the first time I actually enjoyed cauliflower. I was at a tiny bistro and they served these dark, almost burnt looking pieces that were salty and tangy. Up until that point, I thought cauliflower was just the filler on a veggie tray that everyone ignored.
The secret was not some expensive truffle oil or a secret sauce, it was just the courage to let the oven do its job. We are looking for that specific moment where the edges start to shatter when you bite them, while the middle stays velvety and soft.
This approach is perfect for those of us trying to keep things plant based without spending a fortune on fancy meat substitutes. Cauliflower is one of the most budget friendly items in the produce aisle, and it is incredibly versatile.
Whether you are looking for a high protein vegan dinner by pairing this with chickpeas or just need a solid side dish that won't take all night, this method is your new best friend. It's brilliant, it's simple, and it's going to change how you look at the produce section forever.
What Actually Makes It Crispy
Surface Contact: Slicing the florets to create a flat side allows for direct conduction from the hot pan, creating a deep brown crust. Moisture Management: High heat at 425°F evaporates the water within the vegetable rapidly, preventing it from steaming in its own juices.
| Fresh Cauliflower | Frozen Florets | Outcome Comparison |
|---|---|---|
| High crisp potential | Softer texture | Fresh allows for that "shatter" crunch on the edges |
| Requires chopping | Pre cut convenience | Shortcut version often needs 5-10 mins extra to shed ice |
| Best for "steaks" | Best for quick mash | Fresh is the winner for roasting every single time |
Roasting at high temperatures is the only way to ensure the sugars in the vegetable caramelize before the interior becomes overcooked and mushy. If you go too low, you just end up with a sad, limp vegetable that lacks character.
The Critical Numbers for Success with Your Roasted Cauliflower
When it comes to getting this right, precision matters more than you might think. We are working with a 2 lb head of cauliflower, which is the standard size you will find at most grocery stores.
If yours is significantly larger or smaller, you will need to adjust your oil and spices accordingly so every nook and cranny gets covered. The goal is a lacquered look before the tray even touches the oven.
The timing is also a non negotiable factor here. We are looking for exactly 25 minutes of cook time at 425°F. I have tried doing this at 350°F and even 400°F, but it just does not produce the same level of char.
At 425°F, you get that intense sizzle the moment the pan goes in. This is why preheating your oven is the one step you can't skip, because putting vegetables into a cold oven is a recipe for a soggy disaster.
| Servings | Cauliflower Weight | Pan Size | Total Oil |
|---|---|---|---|
| 2 People | 1 lb | Half sheet | 1.5 tbsp |
| 4 People | 2 lbs | Large rimmed sheet | 3 tbsp |
| 6 People | 3 lbs | Two large sheets | 4.5 tbsp |
If you are cooking for a crowd, do not try to squeeze 3 lbs of cauliflower onto one tray. If the florets are touching, they will steam each other. You need at least an inch of space between the pieces so the hot air can circulate and create that crispy exterior we are after.
Selecting the Best Budget Ingredients for Maximum Flavor Impact
You don't need a pantry full of expensive imports to make this dish taste like it came from a high end restaurant. Most of these spices are likely already sitting in your cabinet. The smoked paprika is the heavy hitter here, providing a deep red color and a hint of woodsmoke that pairs perfectly with the charred edges of the vegetable.
I always use extra virgin olive oil because it has the right flavor profile, but if you are on a strict budget, a high-quality vegetable oil or avocado oil will work just fine. The turmeric is a little trick I learned to give the cauliflower a vibrant golden glow, making it look much more appetizing than the pale white it starts as.
Plus, turmeric is great for a plant based diet!
| Ingredient | Science Role | Pro Secret |
|---|---|---|
| Extra Virgin Olive Oil | Heat conductor | Use 3 tbsp to ensure every floret is fully lacquered |
| Smoked Paprika | Color and depth | Provides a "charred" flavor even if you undercook slightly |
| Fresh Lemon Juice | Acid brightness | Adds a zesty finish that cuts through the fatty oil |
| Turmeric | Natural pigment | Creates a golden hue that mimics butter |
The sea salt and freshly cracked black pepper are the foundations. Don't use the pre ground pepper if you can help it, as the oils in fresh pepper really pop under high heat. If you want a more budget friendly cheese option, you can swap the Parmesan for nutritional yeast, which keeps it vegan and adds a nutty, high protein punch.
The Essential Kitchen Tools for a Perfect Crispy Texture
You do not need a lot of gear for this, but the quality of your baking sheet makes a massive difference. I highly recommend a heavy duty, rimmed baking sheet, often called a half sheet pan.
Thin, cheap pans tend to warp in a 425°F oven, which can cause your oil to pool in one corner and leave half your cauliflower dry and the other half greasy.
A large glass or stainless steel bowl is also vital for the mixing stage. You want enough room to really toss the florets around without them flying across the kitchen. I have tried seasoning directly on the pan before, but it never works as well. You end up with uneven spots of spice and oil.
Massaging the emulsion into the cauliflower by hand or with a sturdy spatula ensures that every single flower bud is coated.
Chef's Tip: Freeze your Parmesan wedge for 10 minutes before grating it over the hot cauliflower. It creates finer, fluffier shreds that melt instantly into the crevices.
If you are looking to expand your plant based repertoire, having a solid set of baking sheets is the best investment you can make. They are the workhorses of a healthy kitchen. While you are at it, you might want to try making a Roasted Creamy Carrot Soup which uses very similar roasting techniques to develop deep, complex flavors from simple root vegetables.
Mastering the Method for Flawless oven-roasted Cauliflower Results
Right then, let's get into the actual cooking. Success here is all about the preparation. If your florets are all different sizes, some will burn while others stay raw. Take the extra 2 minutes to make sure everything is uniform.
- Preheat your oven to 425°F (220°C) and ensure the rack is in the center position.
- Cut the 1 large head of cauliflower into uniform bite sized florets, ensuring they are dry. Note: Excess water will cause steaming instead of roasting.
- Slice the larger florets in half to create a wide, flat side for maximum browning.
- In a large bowl, whisk together the 3 tbsp olive oil, 1 tsp sea salt, 1/2 tsp pepper, 1 tsp garlic powder, 1/2 tsp smoked paprika, 1/4 tsp turmeric, and 1/8 tsp cayenne pepper.
- Add the cauliflower to the bowl and toss thoroughly until the florets look lacquered and evenly coated.
- Spread the cauliflower onto a large rimmed baking sheet in a single layer.
- Arrange the pieces so the flat sides are facing down until you see no gaps between the vegetable and the pan.
- Roast for 25 minutes total, but make sure to toss them halfway through at the 12 minute mark.
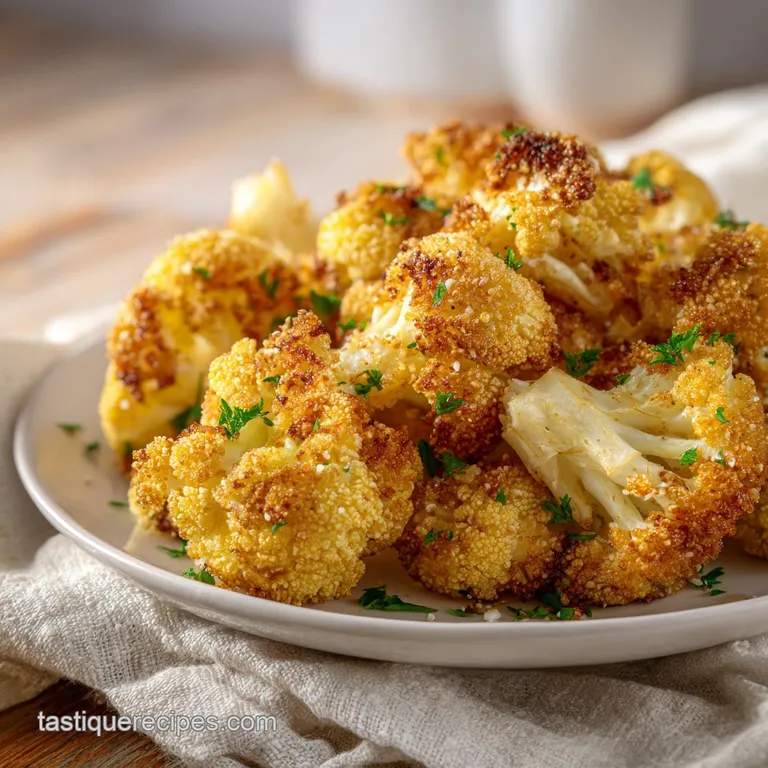
- Remove from the oven until the edges are deep mahogany and the centers are tender.
- Immediately toss with 1 tbsp lemon juice, 2 tbsp parsley, and 2 tbsp Parmesan cheese while the pan is still sizzling.
The sizzle you hear when the lemon juice hits the hot pan is a good sign. It means the cauliflower is hot enough to absorb that acidity into its core. This final step is what separates a "good" roasted vegetable from something truly memorable.
The parsley adds a fresh, herbaceous note that balances out the heavy roasting spices.
Solving Common Texture Issues and Avoiding Mushy Vegetable Results
One of the most common complaints I hear is that the cauliflower turned out soft or soggy. This usually happens for one of two reasons: either the oven wasn't hot enough, or the pan was overcrowded.
If you put too much on one tray, the moisture escaping the vegetables has nowhere to go, so it just sits there and steams the food.
Another issue is the cauliflower looking "dirty" or grey. This often happens if you use too much black pepper or if your turmeric is old. Using fresh spices ensures a bright, vibrant color. If your spices are burning before the vegetable is cooked, you might have your oven rack too high.
Move it to the middle or lower third of the oven to protect the delicate spices from the direct heat of the upper element.
Why Your Vegetable Is Soggy
If your cauliflower lacks that signature crunch, it is likely trapped in a humid environment. This can happen if you wash the cauliflower right before roasting without drying it properly. Use a clean kitchen towel to pat it completely dry. Even a small amount of surface water will ruin the Maillard reaction.
| Problem | Root Cause | Solution |
|---|---|---|
| Soft/Mushy | Overcrowding the pan | Use two pans or roast in batches to allow airflow |
| Burnt Spices | Oven rack too high | Move the tray to the center rack and toss halfway |
| Bland Flavor | Lack of acidity | Don't skip the lemon juice finish; it wakes up the spices |
Common Mistakes Checklist
- ✓ Pat the cauliflower completely dry after washing to prevent steaming.
- ✓ Use a high smoke point oil like olive oil or avocado oil for 425°F heat.
- ✓ Place the flat sides of the florets face down for better caramelization.
- ✓ Wait for the oven to fully preheat before sliding the tray in.
- ✓ Toss the florets at exactly 12 minutes to ensure even browning.
- ✓ Add the fresh herbs and cheese only after the roasting is complete.
Creative Variations Including Air Fryer and Whole Roasted Methods
If you have an air fryer, you can get a very similar result in about half the time. The circulating air is incredibly efficient at crisping up the edges. However, you have to be careful not to overfill the basket, or you will end up with the same steaming problem we discussed earlier.
It is perfect for a quick snack or a single serving.
For a more dramatic presentation, you can try a whole roasted cauliflower. This involves blanching the entire head in salted water for a few minutes first, then slathering it in the spice rub and roasting it for about 45 minutes.
It makes a stunning centerpiece for a plant based dinner party and can be carved like a roast.
| Method | Time | Texture | Best For |
|---|---|---|---|
| Oven Roast | 25 minutes | Deeply charred and nutty | Large family batches |
| Air Fryer | 15 minutes | Maximum exterior crunch | Quick lunches or 1-2 people |
| Whole Roast | 45 minutes | Tender, "meaty" center | Impressive dinner centerpieces |
If you enjoy the "bang bang" style of spicy and sweet flavors, you can actually adapt this roasting method to create a Bang Bang Cauliflower recipe by swapping the paprika and parmesan for a sriracha mayo glaze after roasting. It is a fantastic way to keep your meal rotation exciting without needing new techniques.
Is there a dairy-free "cheesy" version?
Absolutely. For my vegan friends, I always suggest substituting the Parmesan with 2 tablespoons of nutritional yeast. It has a naturally cheesy, umami rich flavor that is incredibly high protein. You can also add a sprinkle of hemp seeds for an extra protein boost and a bit of crunch.
The lemon juice still works perfectly with this dairy-free alternative.
Smart Storage Strategies and Zero Waste Ideas for Leftovers
Roasted cauliflower is best eaten immediately while the edges are still crisp, but it does store surprisingly well. If you have leftovers, keep them in an airtight container in the fridge for up to 4 days. When you are ready to eat them, avoid the microwave! Microwaving will turn them into a sad, rubbery mess.
Instead, throw them back into a hot pan or the air fryer for 3-5 minutes to bring back some of that texture.
For zero waste, do not throw away the leaves or the core of the cauliflower. The inner leaves become incredibly crispy and delicious when roasted right alongside the florets. The core can be diced small and roasted, or saved in a bag in the freezer for your next batch of vegetable stock.
- Fridge: Store in a glass container for 3-4 days.
- Freezer: You can freeze roasted cauliflower for up to 2 months. It won't be crispy when thawed, so it is best used in soups or stews.
- Leftover Hack: Toss cold leftovers into a salad with chickpeas and a tahini dressing for a high protein lunch that doesn't need reheating.
Delicious Plant Based Pairings to Round Out Your Healthy Meal
One of the best ways to enjoy this dish is as a component of a larger bowl. I love serving this over a bed of quinoa or farro with a big dollop of hummus. The smoky paprika and turmeric in the cauliflower play really well with middle eastern flavors.
It also makes a great taco filler if you add a bit of lime and avocado.
Myths About Roasting Vegetables
A common misconception is that you need a "healthy" amount of oil, meaning very little. In reality, the 3 tablespoons of oil recommended here are what allow the heat to transfer efficiently. Without enough fat, the vegetable just dries out and becomes tough instead of crispy.
Another myth is that you should salt at the end. Salting at the beginning allows the salt to penetrate the vegetable as it cooks, seasoning it from the inside out.
If you are looking for a complete meal, this cauliflower pairs beautifully with other roasted dishes. For a cozy dinner, try serving it alongside a Brussels Sprouts Alfredo which offers a creamy, decadent contrast to the charred and smoky cauliflower. The combination of textures is really satisfying and keeps the meal 100% plant based and full of flavor.
Decision Shortcut
- If you want a spicier kick, double the cayenne pepper and add a teaspoon of chili flakes to the oil emulsion.
- If you want a crunchier finish, toss in 1/4 cup of panko breadcrumbs during the last 5 minutes of roasting.
- If you want a richer flavor, use 2 tbsp of melted vegan butter mixed with 1 tbsp of olive oil for the coating.
The beauty of this recipe is that once you master the basic 425°F/25 minute ratio, you can swap the spices for anything you like cumin and coriander for a curry vibe, or rosemary and thyme for a more traditional roast dinner feel.
Trust me on this, once you see those mahogany edges, you will never go back to steamed cauliflower again. Enjoy the sizzle!

Recipe FAQs
What temperature do you roast cauliflower?
Set your oven to 425°F (220°C). This high heat is essential for achieving deep mahogany edges while keeping the centers tender.
Is cooked cauliflower good for diabetics?
Yes, it is an excellent choice. Cauliflower is naturally low in carbohydrates and provides fiber, making it a blood sugar-friendly side dish when roasted with healthy fats like olive oil.
What seasoning is good for roasted cauliflower?
A combination of garlic powder, smoked paprika, turmeric, and cayenne pepper works best. These spices create a complex, savory flavor profile that pairs perfectly with the slight sweetness of the roasted vegetable.
How to make crispy roast cauliflower?
Pat the florets completely dry after washing to prevent steaming. Arrange them on the baking sheet with flat sides facing down to maximize surface contact, which promotes browning. If you enjoy mastering these caramelization techniques for flavor development, apply this same flat surface logic when searing proteins.
Is it true I must boil the cauliflower before roasting?
No, this is a common misconception. Roasting the raw florets directly yields a superior texture and more concentrated flavor than parboiling, which adds excess moisture.
How to prevent cauliflower from getting soggy?
Space the florets out on the baking sheet so they are not crowded. Crowding traps steam, causing the vegetables to soften rather than crisp up during the 25-minute roast.
How to serve roasted cauliflower?
Toss with fresh lemon juice, chopped parsley, and grated Parmesan cheese immediately after removing from the oven. The heat helps the cheese melt slightly, creating a vibrant, finished side dish.
Crispy oven-roasted Cauliflower

Ingredients:
Instructions:
Nutrition Facts:
| Calories | 165 kcal |
|---|---|
| Protein | 5.4 g |
| Fat | 11.9 g |
| Carbs | 12.3 g |
| Fiber | 4.5 g |
| Sugar | 4.3 g |
| Sodium | 615 mg |
