Ube Butter Mochi: Bouncy & Buttery Cake
- Time: Active 15 minutes, Passive 60 minutes, Total 1 hours 15 mins
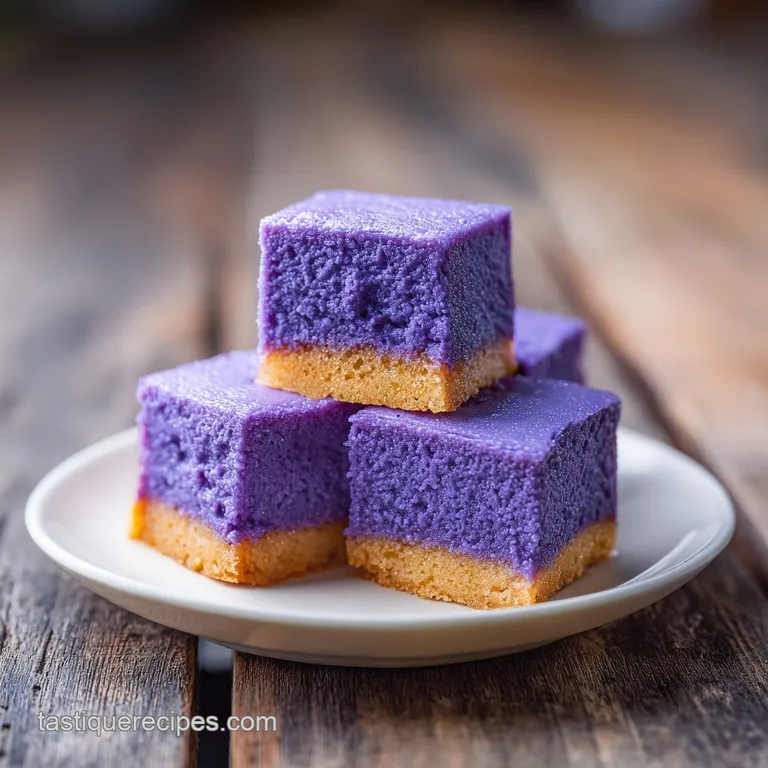
- Flavor/Texture Hook: Chewy, bouncy center with a buttery, shatter crisp top
- Perfect for: Potlucks, afternoon tea, or a modern Asian inspired dessert
- Creating the Ultimate Vibrant Purple Ube Butter Mochi
- The Physics of the Bounce
- Component Analysis and Ingredient Roles
- Essential Elements and Smart Substitutions
- Reliable Kitchen Tools for Success
- Step-by-Step Guide to Perfection
- Troubleshooting Common Baking Obstacles
- Scaling the Recipe Appropriately
- Debunking Common Kitchen Myths
- Storage and Waste Reduction
- Creative Serving Suggestions
- Recipe FAQs
- 📝 Recipe Card
Creating the Ultimate Vibrant Purple Ube Butter Mochi
The first time I pulled a tray of this out of the oven, the aroma was almost dizzying. It’s not just sweet; it’s this heady, floral scent of ube mixing with the toasted, hazelnut like notes of browned butter.
I remember standing in my kitchen, waiting for it to cool, but failing miserably and burning my tongue on a corner piece because that crackly, sugar crusted edge was calling my name.
You know that specific "QQ" texture? That addictive, springy bounce you get from good boba or fresh mochi? This recipe nails it. By browning the butter first, we’re adding a layer of complexity that cuts through the richness of the condensed milk, making it impossible to stop at just one square.
We’re skipping the traditional "plain" version today and going full on vibrant purple. Whether you’re a long time ube fan or just curious about that stunning violet hue, this cake is the most forgiving bake in my repertoire. There’s no yeast to worry about and no delicate egg whites to fold.
Just pure, chewy bliss.
The Physics of the Bounce
Starch Gelatinization: As the Mochiko heats up with the liquids, the starch granules swell and burst, creating a stable, elastic network that gives the cake its signature chewy "QQ" texture.
Maillard Reaction: The combination of sweetened condensed milk and browned butter creates a rapid browning effect on the surface, resulting in a thin, shatter crisp crust that contrasts the soft interior.
| Method | Total Time | Texture | Best For |
|---|---|---|---|
| Classic Oven Bake | 1 hours 15 mins | Crispy top, bouncy core | Standard batches |
| Air Fryer (Small) | 35 minutes | Extra crunchy edges | Fast cravings |
| Steamed Method | 50 minutes | Silky, uniform softness | Traditional mochi feel |
This recipe leans into the oven baked method because that textural contrast between the top and the middle is what makes it restaurant quality. If you enjoy the floral notes here, you'll find similar vibes in my Ube Crinkle Cookies recipe, which use a comparable flavor profile but in a soft, pillowy cookie form.
Component Analysis and Ingredient Roles
| Ingredient | Science Role | Pro Secret |
|---|---|---|
| Mochiko Flour | Structural Foundation | Never swap for regular rice flour; only glutinous rice provides the "stretch." |
| Browned Butter | Flavor & Fat | Browning the butter removes water, intensifying the nutty aroma and creating a richer crumb. |
| Ube Halaya | Density & Flavor | This jam adds actual yam fiber, which keeps the cake moist for days longer than extract alone. |
Essential Elements and Smart Substitutions
- Mochiko (16 oz): This is non negotiable. Look for the blue Koda Farms star brand. Why this? It provides the specific glutinous starch needed for the chewy, elastic texture.
- Substitute: Thai Sweet Rice Flour (Green bag). It’s slightly more "stretchy" but works well.
- Unsalted Butter (1/2 cup): We’re browning this until it smells like toasted nuts. Why this? Browning adds a savory counterpoint to the sugary condensed milk.
- Substitute: Virgin coconut oil. It keeps it dairy-free but you lose that toasted depth.
- Full fat Coconut Milk (13.5 oz): Stick to the canned stuff, not the carton. Why this? The high fat content ensures a velvety mouthfeel rather than a rubbery one.
- Substitute: Heavy cream. It works, but you'll lose that authentic tropical coconut undertone.
- Sweetened Condensed Milk (14 oz): This is our primary sweetener and binder.
- Substitute: Thickened coconut condensed milk for a dairy-free alternative.
- Ube Halaya (1/2 cup): This is purple yam jam.
- Substitute: Mashed purple sweet potato mixed with a little honey.
- Ube Extract (2 tsp): This provides the iconic color and a boost of floral flavor.
- Granulated White Sugar (1 cup): Helps create that crackly top.
- Large Eggs (2): Provide structure so the mochi doesn't collapse into a puddle.
- Baking Powder (2 tsp): Gives it just enough lift to stay light.
- Fine Sea Salt (1/2 tsp): Essential to balance the sugar.
Reliable Kitchen Tools for Success
You don't need a high end stand mixer for this; in fact, a simple whisk and a sturdy bowl often yield a better texture because you aren't over incorporating air. A 9x13 inch metal baking pan is standard, though a glass pyrex works if you adjust the time.
A small light colored saucepan is helpful for browning the butter so you can actually see the milk solids turning golden. If you use a dark pan, you’re flying blind and might end up with burnt bits.
Finally, a flexible silicone spatula is your best friend here to scrape every last bit of that purple gold into the pan.
step-by-step Guide to Perfection

- Brown the butter. Melt the 1/2 cup of butter in a saucepan over medium heat, swirling until the foam subsides and you see golden brown bits at the bottom. Note: Stop immediately when it smells like hazelnuts.
- Prep the oven. Preheat to 350°F (180°C) and grease a 9x13 inch pan thoroughly with butter or cooking spray.
- Whisk the wet base. In a large bowl, combine the warm browned butter, condensed milk, and coconut milk until smooth.
- Incorporate the purple. Whisk in the ube halaya, ube extract, and the 2 eggs until the color is a uniform, deep violet.
- Mix the dry. In a separate bowl, whisk the 16 oz Mochiko, sugar, baking powder, and salt to remove any large clumps.
- Combine the masses. Slowly pour the dry ingredients into the wet, whisking constantly until the batter is velvety and lump free.
- Transfer the batter. Pour into your prepared pan and tap it firmly on the counter to release trapped air bubbles.
- The long bake. Bake for 60 minutes until the edges are pulling away and the top is matte and slightly crackled.
- The patience test. Let it cool completely in the pan for at least 2 hours. Note: Slicing too early results in a sticky, unmanageable mess.
- Slice and serve. Use a plastic knife (the pro secret for clean mochi cuts) to divide into 24 squares.
Troubleshooting Common Baking Obstacles
Why Your Cake Is Sticky
If the center feels wet or sticks to your knife like glue, it usually means the starch didn't fully gelatinize. This happens if the oven temp was too low or if you used a generic rice flour instead of glutinous rice flour.
To Fix a Greasy Surface
Sometimes the butter separates during the bake, leaving a pool of oil on top. This is often caused by using "light" coconut milk which doesn't have the emulsifiers to hold the fats together. You can blot it with a paper towel, but next time, stick to the full fat canned version.
| Problem | Root Cause | Solution |
|---|---|---|
| Sunken Center | Too much air whisked in | Whisk gently by hand; don't use a high speed electric mixer. |
| Rubbery Texture | Overbaked or old flour | Check freshness of Mochiko; pull from oven as soon as edges pull away. |
| Dull Color | Old extract or low jam ratio | Ensure ube halaya is fresh; use a high-quality extract like McCormick or Butterfly. |
Common Mistakes Checklist
- ✓ Using regular rice flour instead of glutinous (Mochiko) - it will never set.
- ✓ Slicing while warm - the internal structure needs time to firm up as it cools.
- ✓ Using "refrigerated" coconut milk from a carton - it’s too watery.
- ✓ Forgetting to tap the pan - large air pockets will ruin the dense, chewy crumb.
- ✓ Not browning the butter - you miss out on 50% of the flavor profile.
Scaling the Recipe Appropriately
If you’re making this for a smaller household, you can easily halve the recipe and bake it in an 8x8 inch square pan. When halving, use one large egg and reduce the bake time to about 45 minutes.
Because mochi is so dense, it's very forgiving with scaling, but avoid doubling it into a single deep pan or the center will remain raw while the edges burn.
| Servings | Pan Size | Ingredient Adjustment | Cook Time |
|---|---|---|---|
| 12 People | 8x8 inch | 0.5x all ingredients | 45 minutes |
| 24 People | 9x13 inch | Use Schema amounts | 60 minutes |
| 48 People | Two 9x13 pans | 2x all ingredients | 65 minutes |
For a completely different texture profile that still hits those cozy notes, you might try serving these alongside my Einkorn Biscuits Recipe, which offers a flaky, buttery contrast to the chewy mochi.
Debunking Common Kitchen Myths
Myth: You must sift the Mochiko twice. Actually, glutinous rice flour is very fine. A simple whisking in the bowl is enough to break up any clumps. Sifting twice just incorporates too much air, which can cause the cake to rise and then collapse.
Myth: Ube and purple sweet potato are the same thing. They are close cousins, but ube (yam) is much more floral and nutty. If you substitute with Okinawan sweet potato, the flavor will be earthier and the texture slightly grainier, though still tasty.
Myth: Butter mochi needs to be refrigerated. Cold temperatures actually make the starch go through "retrogradation," which makes it hard and crumbly. Keep it at room temperature for the best "QQ" experience.
Storage and Waste Reduction
Storage: Keep your mochi in an airtight container at room temperature for up to 3 days. If it starts to get slightly firm, a quick 10 second zap in the microwave will revive that bouncy texture. You can freeze individual squares wrapped in plastic wrap for up to 2 months.
Thaw at room temperature and toast briefly for a "crispy edge" revival.
Zero Waste: If you have leftover ube halaya in the jar, stir it into your morning oatmeal or swirl it into pancake batter. Don't toss the browned butter bits that stick to the pan scrape those into the batter!
If the mochi gets too hard after a few days, cut it into small cubes and fry them in a little coconut oil until crispy to use as "croutons" for vanilla ice cream.
Creative Serving Suggestions
While this cake is a star all on its own, you can easily turn it into a high end dessert. My favorite way to serve it is slightly warm with a scoop of coconut sorbet or macapuno (sport coconut) strings on top. The cold creaminess against the chewy, floral cake is incredible.
If you're hosting a brunch, try cutting the mochi into long "fingers" and serving them with a side of condensed milk for dipping. The vibrant purple color makes it a focal point of any table, and since it's naturally gluten-free (just double check your baking powder), it's a safe bet for crowds with mixed dietary needs.
Just remember: it's all about that chew!
Chef's Tip: Use a plastic knife to cut your mochi. It sounds strange, but the starch won't stick to plastic the way it sticks to metal, giving you those clean, sharp edged squares every time.

Recipe FAQs
What is ube mochi made of?
Mochiko flour, ube halaya, condensed milk, and coconut milk. Mochiko, or glutinous sweet rice flour, is the essential ingredient that provides the signature chewy and elastic "QQ" texture.
What does ube butter mochi taste like?
It tastes floral, sweet, nutty, and deeply satisfying. The ube provides a unique floral sweetness while the browned butter adds a rich, toasted, almost hazelnut like complexity cutting through the sugar.
What does adding butter to mochi do?
It adds richness, tenderness, and improves the surface texture. Browning the butter specifically removes moisture and deepens the flavor, creating a richer crumb that contrasts beautifully with the chewiness.
Is ube mochi healthy?
No, it is a rich dessert treat, not a health food. It contains high amounts of sugar from condensed milk and saturated fats from coconut milk, though it is naturally gluten-free due to the rice flour base.
How do I ensure the characteristic "QQ" chewiness in my mochi?
Use 100% Mochiko (sweet glutinous rice flour) and do not overbake. The starch granules in Mochiko must fully gelatinize to achieve that bouncy texture; using regular rice flour will result in a crumbly cake.
Is it true you must let butter mochi cool completely before slicing?
Yes, waiting is crucial for clean presentation. Slicing while warm causes the tender, hot starches to immediately stick to the knife, resulting in a messy slice; let it cool for at least two hours to firm up the internal structure.
Can I make this dairy-free by swapping all the butter and milk?
Yes, you can substitute the dairy components with alternatives. Replace the butter with refined coconut oil and the condensed milk with a thick, sweetened coconut condensed milk for a dairy-free version, similar to the binding work in a Vegan Cashew Glaze recipe.
Ube Butter Mochi Recipe

Ingredients:
Instructions:
Nutrition Facts:
| Calories | 237 kcal |
|---|---|
| Protein | 3.4 g |
| Fat | 9.4 g |
| Carbs | 35.6 g |
| Fiber | 0.4 g |
| Sugar | 19.5 g |
| Sodium | 75 mg |
