One Pot Chicken and Rice: Golden and Fluffy
- Time: 10 min active + 30 min cook = Total 40 mins (plus 5 min resting)
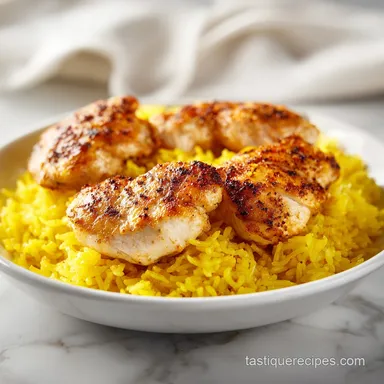
- Flavor/Texture Hook: Golden brown seared thighs with fluffy, savory grains
- Perfect for: Stress free weeknight dinners or beginner home cooks
- One Pot Chicken and Rice Recipe
- Nailing This Recipe
- The Ingredient Breakdown
- Essential Kitchen Tools
- Ingredients and Substitutes
- Step-by-Step Cooking
- Expert Tips and Traps
- Troubleshooting Common Issues
- Adjusting the Batch Size
- Common Misconceptions
- Storage and Freshness
- Plating and Serving
- Recipe FAQs
- 📝 Recipe Card
One Pot Chicken and Rice Recipe
That loud, aggressive sizzle when the chicken thighs first hit the hot olive oil is the sound of victory. I remember the first time I tried this, I was too timid with the heat and the chicken just steamed in its own juices, turning a pale, sad gray.
It took a few tries to realize that the "brown" is where the magic lives, and once I stopped worrying about a little splatter on the stove, everything changed.
The secret here is really the long grain white rice. I've tried using short grain or brown rice in this specific method, but they just don't behave the same. Long grain rice has the right structure to stay separate and fluffy, absorbing the chicken broth without turning into a porridge like mess.
It's the hero of the dish, acting like a sponge for all those aromatics.
You can expect a meal that hits every note, from the richness of the seared chicken to the bright pop of frozen peas added at the end. This one pot chicken and rice recipe is all about contrast, pairing the deep, savory crust of the meat with the light, airy texture of the rice.
It's the kind of meal that makes your whole house smell like a cozy Sunday afternoon, even if it's actually a Tuesday night.
Nailing This Recipe
The trick to this dish isn't in a fancy ingredient, but in how the components interact. I spent way too long thinking I needed a special pot, but any heavy bottomed vessel will do as long as you manage the heat.
The Searing Phase: Getting a deep crust on the chicken creates a flavor base in the pot. When the chicken browns, it leaves behind caramelized bits (called fond) that the rice eventually absorbs, which is why the rice tastes so rich.
The Rice Toast: Sautéing the rinsed rice in the oil for a couple of minutes before adding the broth is non negotiable. This coats each grain in fat, which helps prevent them from sticking together and ensures a fluffy finish.
The Steam Lock: Once the lid goes on, it stays on. Lifting the lid to "check" the rice lets out the precious steam needed to cook the grains evenly, which often leads to hard spots in the rice.
The Resting Period: Letting the pot sit for 5 minutes off the heat allows the remaining moisture to redistribute. This is when the rice finishes its final expansion and becomes truly velvety.
| Method | Prep Time | Texture | Best For |
|---|---|---|---|
| Fast (Stovetop) | 10 minutes | Fluffy & Moist | Weeknight Meals |
| Classic (Oven) | 15 minutes | Toasted Top | Sunday Roast |
The Ingredient Breakdown
I've found that using the right version of each ingredient makes a massive difference in the final result. For example, using boneless, skinless thighs instead of breasts is a choice I'll stand by every time because they don't dry out during the simmer.
| Ingredient | Science Role | Pro Secret |
|---|---|---|
| Long grain Rice | Starch Structure | Rinse until water is clear to remove excess surface starch |
| Chicken Thighs | Fat & Flavor | Pat completely dry before searing for a better crust |
| Chicken Broth | Hydration & Salt | Use low sodium so you can control the seasoning yourself |
| Olive Oil | Heat Transfer | Use a high smoke point oil to avoid burnt flavors |
Essential Kitchen Tools
You don't need a professional kitchen for this, but a few specific tools make it easier. I personally use a heavy bottomed Dutch oven, but a deep skillet with a tight lid works just as well.
The most important tool is a lid that actually fits. If your lid is loose, you're losing steam, and your rice will be unevenly cooked. If you have a gap, I've found that placing a piece of parchment paper or foil over the pot before putting the lid on creates a better seal.
Also, a sturdy fork is essential for the final fluffing. Don't use a spoon, as that can mash the grains and ruin the texture you worked so hard to achieve.
Ingredients and Substitutes
Here is exactly what you'll need. I've listed some swaps if you're missing something, but keep in mind they might change the vibe of the dish.
- 1.5 lbs boneless, skinless chicken thighs Why this? Higher fat content keeps meat juicy during simmering
- 2 tbsp olive oil (Substitute: Avocado oil - works similarly with higher heat)
- 1 tsp salt (Substitute: Sea salt for a cleaner taste)
- 1/2 tsp black pepper (Substitute: White pepper for a milder heat)
- 1 tsp paprika (Substitute: Smoked paprika for a woodsy depth)
- 1 medium onion, finely diced (Substitute: Shallots for a sweeter, milder flavor)
- 3 cloves garlic, minced (Substitute: Garlic powder, but fresh is better)
- 2 medium carrots, diced (Substitute: Parsnips for an earthy twist)
- 2 stalks celery, diced (Substitute: Bok choy stems for a bit of Asian influence)
- 1 1/2 cups long grain white rice, uncooked and rinsed Why this? Prevents mushiness and stays fluffy (Substitute: Basmati - works well but slightly nuttier)
- 3 cups low sodium chicken broth Why this? Provides the primary flavor for the rice (Substitute: Vegetable broth - adds a lighter, garden flavor)
- 1 tsp dried thyme (Substitute: Dried oregano for a Mediterranean feel)
- 1 bay leaf (Substitute: A pinch of crushed bay leaves)
- 1/2 cup frozen peas (Substitute: Frozen corn or diced zucchini)
| Original Ingredient | Substitute | Why It Works |
|---|---|---|
| Chicken Thighs | Chicken Breast | Leaner protein. Note: Cooks faster; risk of drying out |
| Long grain Rice | Brown Rice | Higher fiber. Note: Requires more liquid and 40+ mins cook time |
| Chicken Broth | Water + Bouillon | Budget friendly. Note: Watch salt levels carefully |
I've found that if you want a more decadent version, you can look into my Creamy Chicken and Rice approach, which adds a bit of richness to the finish.
Step-by-step Cooking

Let's get into it. Follow these steps closely, and pay attention to the sensory cues - that's how you'll know it's actually working.
Season the chicken thighs with salt, pepper, and paprika. Heat olive oil in a large heavy bottomed pot over medium high heat. Sear chicken for 3–5 minutes per side until golden brown and sizzling; remove and set aside.
Note: Don't crowd the pan or the chicken will steam
Reduce heat to medium. Add the diced onion, carrots, and celery to the pot. Cook for 4–6 minutes until vegetables have softened and become translucent. Stir in the minced garlic and cook for 30 seconds until fragrant.
Stir in the rinsed rice, coating the grains in the oil and juices for 2 minutes until the edges of the rice look translucent. This is where the flavor builds.
Pour in the chicken broth, thyme, and bay leaf. Stir gently to scrape up any brown bits from the bottom of the pot.
Return the seared chicken and any juices to the pot, nestling the meat into the rice. Bring the liquid to a boil.
Cover with a tight lid and reduce heat to low. Simmer for 18–20 minutes without lifting the lid. Trust the process here.
Remove from heat and let sit, covered, for 5 minutes. This is the resting phase that prevents the rice from sticking to the bottom.
Remove the lid, discard the bay leaf, and stir in the frozen peas. Gently fluff the rice with a fork until it's light and airy.
Expert Tips and Traps
Cooking one pot meals is a balancing act. The biggest trap is the "curiosity peek" - opening the lid during the simmer. When you do that, you lose heat and moisture, which can leave you with half cooked grains.
Another common mistake is not rinsing the rice. If you don't rinse it, the extra starch stays on the outside of the grain, and as it cooks, it creates a gluey texture. I always rinse my rice in a fine mesh strainer until the water runs completely clear.
Chef Note: If you want an even deeper flavor, try adding a teaspoon of tomato paste when you add the garlic. It adds a subtle acidity and a richer color without making it taste like a tomato sauce.
Troubleshooting Common Issues
| Issue | Solution | |
|---|---|---|
| Why Your Rice is Mushy | This usually happens because of too much liquid or too much stirring. Stirring the rice while it simmers releases starch, which thickens the liquid into a porridge. | |
| Why Your Chicken is Tough | This is almost always due to boiling the chicken too aggressively. Once the liquid reaches a boil, you must drop the heat to low immediately. A gentle simmer is what keeps the thighs tender. | |
| Why the Bottom Burned | This happens if the heat is too high or the pot isn't heavy bottomed. If you feel the bottom scorching, you can carefully pour a tablespoon of water around the edges to create a burst of steam. |
Adjusting the Batch Size
If you're cooking for a crowd or just for yourself, you can't just double everything blindly. Here is how I handle scaling for this one pot chicken and rice recipe.
Scaling Down (Half Batch) Use a smaller pot to ensure the liquid doesn't evaporate too quickly. Reduce the simmer time by about 20% (start checking at 15 minutes), and use 1 tablespoon of oil. Be careful with the salt; use slightly less than half.
Scaling Up (Double Batch) Don't double the spices and salt - start with 1.5x and taste at the end. Liquids should be reduced by about 10% because a larger volume of food traps more steam. I highly recommend searing the chicken in batches so you don't crowd the pan and lose the sear.
Oven Adaptation If you prefer the oven, sear the chicken and sauté the veggies on the stove, then transfer everything to a baking dish. Bake at 350°F (180°C) for about 30-35 minutes. This gives you a slightly toasted top on the rice.
Common Misconceptions
You'll hear people say that you need to "seal in the juices" by searing meat. That's actually a myth. Searing doesn't create a waterproof seal; it just creates a flavor crust. The moisture loss happens regardless, but the taste is infinitely better when you sear.
Another myth is that you should stir the rice occasionally to make sure it doesn't stick. In reality, stirring is the enemy of fluffy rice. The less you touch it during the simmer, the better the texture will be.
Storage and Freshness
This dish keeps surprisingly well. Store it in an airtight container in the fridge for up to 4 days.
Reheating Rice tends to dry out in the fridge. To fix this, add a splash of chicken broth or water to the bowl before microwaving. Cover it with a damp paper towel to create a steam chamber, and heat in 1 minute intervals.
Freezing You can freeze this for up to 2 months. I recommend freezing it in individual portions. When you're ready to eat, thaw it in the fridge overnight before reheating on the stove with a bit of extra water.
Zero Waste Tips If you have leftover carrots or celery stems, dice them up and throw them into the base. If you have a few leftover chicken thighs, they make a great addition to a Chicken Pot Pie Soup the next day. Even the remaining chicken broth in the fridge can be used to deglaze the pan for a quick pan sauce.
Plating and Serving
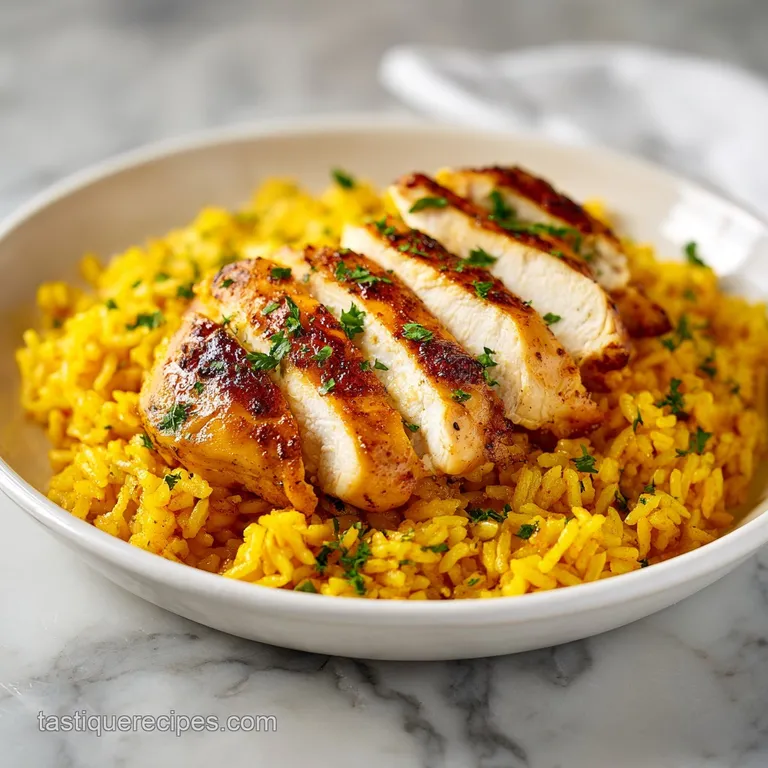
Since this is a one pot meal, presentation is all about the contrast of colors. The golden chicken against the white rice and bright green peas looks great, but you can take it further.
I like to serve this in wide, shallow bowls. Place a generous scoop of rice first, then nestle the chicken thighs on top. Garnish with a handful of freshly chopped parsley or sliced green onions for a pop of brightness.
A squeeze of fresh lemon juice over the top right before serving cuts through the richness of the chicken thighs and awakens all the flavors. If you want something extra, a side of steamed broccoli or a crisp garden salad provides the perfect balance to this hearty dinner.
Recipe FAQs
Can I cook rice and chicken together in one pot?
Yes, it is the most efficient method. Searing the chicken first and then simmering it with the rice ensures both cook through perfectly in one vessel.
Can you cook raw chicken and rice at the same time?
Yes, provided you sear the chicken first. Browning the meat creates flavor and ensures the chicken reaches a safe internal temperature while the rice absorbs the broth.
Can a diabetic eat baked chicken?
Yes, chicken is a lean protein. To keep this specific dish balanced, focus on the chicken and vegetables while monitoring the serving size of the white rice.
Should I rinse rice before one pot of chicken and rice?
Yes, rinse until the water runs clear. This removes excess surface starch, which prevents the grains from clumping or becoming mushy.
Why is my rice mushy?
Too much liquid or over stirring is the cause. Stirring the rice during the simmering phase releases starch, which thickens the liquid into a porridge like consistency.
How to prevent the bottom of the pot from burning?
Use a heavy bottomed pot on low heat. A thick base distributes heat evenly, preventing hot spots from scorching the rice during the 18 20 minute simmer.
Can I make this in a slow cooker?
Yes, though the texture will be softer. For a similar set-it-and-forget-it approach, you can try our crockpot chicken.
One Pot Chicken And Rice