Peanut Butter Cookies: Soft and Chewy Homemade Recipe
- Time: Active 35 minutes, Passive 10 minutes, Total 45 minutes
- Flavor/Texture Hook: A salty sweet balance with a distinctive mahogany brown shatter on the edges.
- Perfect for: School bake sales, rainy afternoon snacks, or a nostalgic weekend baking project.
- Authentic Peanut Butter Cookies and the Secret to Texture
- Why This Works and the Magic of Texture
- Timing and Precision for the Best Batch Ever
- Selecting Quality Ingredients for Deep Nutty Flavor
- The Tools That Ensure Even Golden Baking
- Step by Step Guide to Flawless Cookie Dough
- Common Mistakes and How to Avoid Them
- Adjusting the Batch Size for Any Occasion
- Customizing Your Cookies with Creative Additions
- Debunking Cookie Myths in the Kitchen
- Storing and Freezing for Freshness Later
- Perfect Pairings for Your Warm Peanut Butter Treats
- Recipe FAQs
- 📝 Recipe Card
Authentic Peanut Butter Cookies and the Secret to Texture
Picture this: It is a drizzly Tuesday afternoon, and the house feels just a bit too quiet. You wander into the kitchen, and that familiar craving hits not for something fancy or complicated, but for that specific, salty sweet crunch that only comes from a tray of warm cookies.
I remember standing in my grandmother's sun drenched kitchen, watching her use a tined fork to press those iconic "X" marks into balls of dough. The sizzle as the tray hit the hot oven rack and the smell of toasted nuts filling the air is a sensory memory that never fades.
Getting these cookies right isn't just about mixing ingredients; it is about respecting the ratio of fats to sugars. I used to think any old peanut butter would do, but I quickly learned that the moisture content in your jar dictates whether your cookie stays soft or turns into a hockey puck.
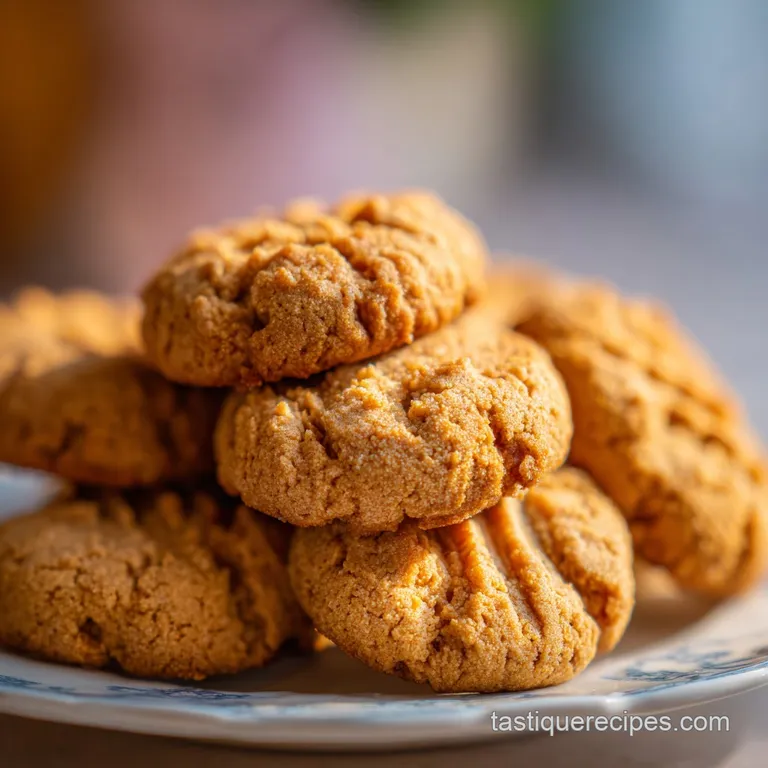
We are looking for that velvety middle ground where the edges have a clean shatter but the center remains tender. It is a humble bake, but when you pull a tray of these mahogany brown beauties out of the oven, you'll realize why they are a staple in every rustic baking repertoire.
We aren't just making a snack here; we are leaning into the warmth of home style baking. By focusing on the quality of our sugars and the temperature of our butter, we can transform a simple cupboard staple into something that feels like a genuine treat.
Let's look at why this specific method works so well to create that signature crumb we all love.
Why This Works and the Magic of Texture
Understanding the physics of your dough helps you predict exactly how it will behave once it hits the heat.
- Sugar Aeration: Creaming the butter with both granulated and brown sugar creates tiny air pockets that expand, giving the cookie its lift without relying solely on chemical leaveners.
- Fat Stabilization: The high fat content in peanut butter provides a tender crumb, but chilling the dough ensures the fats don't melt too quickly, preventing a greasy puddle.
- The Salt Factor: Adding fine sea salt doesn't just make things salty; it suppresses the bitterness of the roasted peanuts and amplifies the floral notes of the vanilla.
- Gluten Control: By folding the flour in at the very end on low speed, we keep the gluten strands short, which is what gives us that characteristic "melt in-your mouth" feel.
| Method | Total Time | Resulting Texture | Best For |
|---|---|---|---|
| No Chill Fast Method | 25 minutes | Thin, crispy, spreads more | Quick sugar cravings |
| Classic Chilled Dough | 45 minutes | Thick, chewy, holds shape | Professional bakery look |
| Overnight Rest | 12 hours | Deep caramel notes, soft | Maximum flavor development |
Chilling the dough for those 20 minutes is the difference between a cookie that stands tall and one that disappears into its neighbor. This short rest allows the flour to fully hydrate, meaning the moisture from the egg and butter is evenly distributed, leading to a more consistent bake across the entire tray.
Timing and Precision for the Best Batch Ever
Consistency is the friend of every home cook, and having your specs lined up before you start prevents those mid bake panics.
| Component | Role in the Bake | Pro Secret |
|---|---|---|
| Light Brown Sugar | Moisture and chew | Pack it tightly to ensure you get the full volume and molasses kick. |
| Creamy Peanut Butter | Fat and structural base | Use a standard commercial brand like Jif or Skippy for the most predictable spread. |
| Baking Soda | Browning and spread | It reacts with the acidic brown sugar to create those beautiful golden edges. |
When we talk about the architecture of a cookie, we have to look at how these elements interact. If you've ever experimented with heritage grains or more complex bases like rye flour cookies, you know that the protein content in your flour changes everything. For this recipe, we stick to all purpose flour to provide just enough structure to hold that heavy peanut butter without making the final result feel like bread.
Selecting Quality Ingredients for Deep Nutty Flavor
You don't need a massive grocery list for this, but the quality of what you do use matters immensely.
- 1/2 cup (115g) Unsalted Butter: Make sure it is softened to room temperature so it incorporates smoothly. Why this? It allows for better aeration during the creaming stage.
- 1/2 cup (100g) Granulated White Sugar: Provides the crisp edges. Why this? White sugar dries out the edges for a satisfying crunch.
- 1/2 cup (100g) Packed Light Brown Sugar: Adds the chew. Why this? The molasses content keeps the center soft and adds depth.
- 3/4 cup (190g) Creamy Peanut Butter: The heart of the cookie. Why this? Creamy style provides a velvety, consistent texture.
- 1 Large Egg: Use it at room temperature. Why this? Cold eggs can seize the butter, leading to a lumpy dough.
- 1 tsp Pure Vanilla Extract: Rounds out the flavors. Why this? Vanilla acts as a bridge between the salt and the sugar.
- 1 1/4 cups (155g) All Purpose Flour: The structural bones. Why this? Provides enough protein for a sturdy but tender cookie.
- 3/4 tsp Baking Soda: Encourages browning. Why this? Works with the brown sugar for the perfect rise.
- 1/2 tsp Baking Powder: Gives a little extra lift. Why this? Ensures the cookies aren't too dense.
- 1/4 tsp Fine Sea Salt: To balance the sweetness. Why this? Salt is essential to make the peanut flavor pop.
| Original Ingredient | Substitute | Why It Works |
|---|---|---|
| Unsalted Butter | Salted Butter | Works fine; just omit the 1/4 tsp of extra salt. |
| Creamy Peanut Butter | Crunchy Peanut Butter | Same fat content. Note: Adds texture but might make the fork press slightly messier. |
| All Purpose Flour | 1 to-1 gluten-free Blend | Rice based blends mimic the structure well. Note: Cookies may be slightly more fragile. |
If you find yourself running low on brown sugar, you can actually make a quick version by mixing white sugar with a tiny splash of molasses. It is a lifesaver when you're halfway through a recipe and realize the pantry is bare.
Just keep the ratios the same to ensure the moisture levels don't throw off the chemistry of the dough.
The Tools That Ensure Even Golden Baking
You don't need a high end kitchen to pull this off, but a few specific tools make the process much more enjoyable and the results more professional.
For the Creamed Base
A stand mixer is your best friend here. It allows you to walk away for those three minutes while the butter and sugars are working their magic. If you don't have one, a sturdy hand mixer works too, but you’ll need a bit of patience to get that "pale and fluffy" look.
Use a silicone spatula to scrape the sides often; you don't want any hidden streaks of butter at the bottom of the bowl.
For the Precise Portioning
I highly recommend a 1.5 tablespoon cookie scoop. It isn't just about being neat; it is about ensuring every cookie is exactly the same size so they bake at the same rate. When your cookies vary in size, the small ones burn while the big ones stay raw in the middle.
Consistency in size leads to consistency in color and snap.
For the Perfect Bake
Invest in some heavy rimmed baking sheets. Thin, cheap pans warp in the heat and often have "hot spots" that burn the bottoms of your cookies. Lining them with parchment paper is a non negotiable for me it prevents sticking and makes cleanup a breeze.
Plus, it allows you to slide the whole sheet of cookies off the hot pan and onto a cooling rack without breaking them.
step-by-step Guide to Flawless Cookie Dough
Let's get into the actual rhythm of the kitchen. Follow these steps closely, and pay attention to the visual cues.
- Cream the softened butter with granulated sugar and light brown sugar in a stand mixer on medium high speed for at least 3 minutes until pale and fluffy. Note: This step builds the air structure.
- Add the creamy peanut butter and mix until fully integrated and smooth.
- Add the egg and vanilla extract, scraping the bowl to ensure no streaks remain.
- In a separate medium bowl, whisk together the flour, baking soda, baking powder, and fine sea salt until no lumps are visible.
- Gradually add the dry ingredients to the wet mixture, mixing on low speed until just combined. Note: Overmixing here will make the cookies tough.
- Chill the dough in the refrigerator for 20 minutes until firm to the touch.
- Preheat your oven to 350°F (175°C) and line two large rimmed baking sheets with parchment paper.
- Using a 1.5 tablespoon cookie scoop, form the dough into balls and roll them in extra sugar for a sparkling finish.
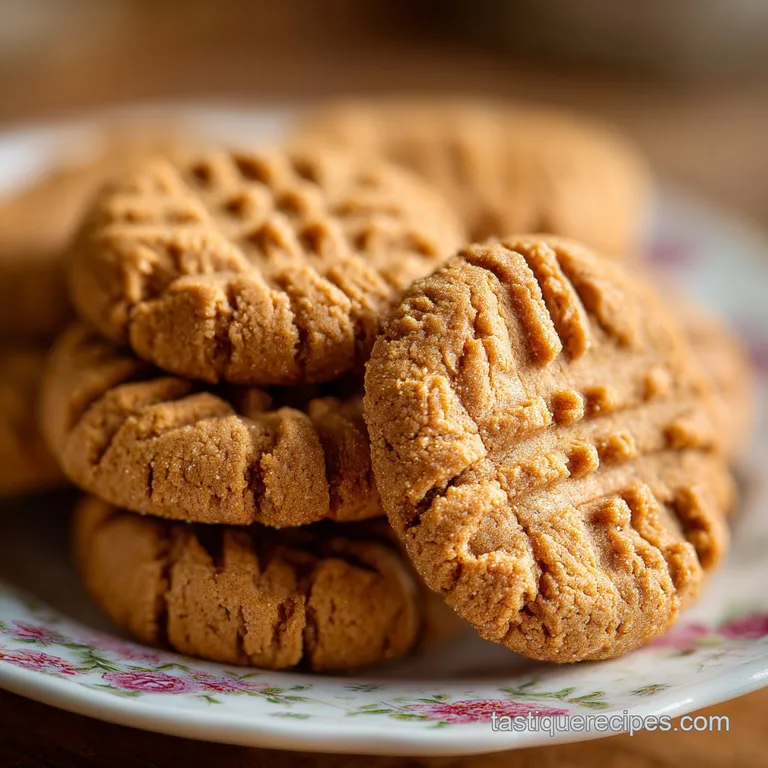
- Place balls 2 inches apart and use a fork to create a crosshatch pattern, pressing down firmly but gently.
- Bake for 10 minutes until the edges are mahogany brown but the centers still look slightly soft.
- Allow cookies to cool on the baking sheet for 5 minutes until they set enough to move.
Chef's Tip: If you want a more rustic, craggy look, don't roll the balls too smoothly. A slightly irregular surface catches the heat differently and creates more "crunch" points.
Common Mistakes and How to Avoid Them
Even the most seasoned bakers run into trouble sometimes. Peanut butter is a temperamental ingredient because its oil content can vary so much from brand to brand.
Why Your Cookies Spread Too Much
If your cookies come out looking like thin pancakes rather than sturdy discs, the culprit is usually the temperature of the fat. If your butter was too melted when you started, or if you skipped the chilling step, the fat will liquefy before the flour has a chance to set its structure.
Always ensure your butter is "room temperature" which actually means it should be cool to the touch and hold a thumbprint without being greasy.
Why Your Cookies Are Dry
A dry, sandy cookie usually means there was too much flour or the cookies were left in the oven just a minute too long. Remember that cookies continue to cook on the hot tray after you pull them out of the oven. This is called carryover cooking.
If they look "perfect" in the oven, they will be overdone by the time they cool. They should still look a little "under" in the center when you pull them.
| Problem | Root Cause | Solution |
|---|---|---|
| Cracked Edges | Dough is too cold or dry | Let dough sit for 2 mins or add 1 tsp of milk. |
| No Crosshatch Visible | Pressed too lightly | Press firmly until the dough is about 1/2 inch thick. |
| Burnt Bottoms | Oven rack is too low | Bake in the center of the oven on a heavy sheet. |
Common Mistakes Checklist:
- ✓ Always use room temperature eggs to prevent the batter from curdling.
- ✓ Measure your flour by spooning it into the cup rather than scooping directly from the bag (prevents packing).
- ✓ Ensure your baking soda is fresh; if it's over six months old, the cookies won't rise or brown correctly.
- ✓ Don't overcrowd the pan; these need space for the heat to circulate around the edges.
- ✓ Wait the full 5 minutes before moving them, or they will crumble in your hands.
Adjusting the Batch Size for Any Occasion
Sometimes you only need a dozen for a small household, and other times you need forty eight for a party. Here is how to scale without losing that signature texture.
Making a Half Batch
When you're cutting the recipe in half, the trickiest part is the egg. The best way to handle this is to crack the egg into a small bowl, whisk it well, and then use half of the liquid (roughly 25-28 grams). Use smaller bowls for mixing so the ingredients don't get lost on the sides of a giant stand mixer bowl.
You might find the baking time stays almost the same, but keep a close eye at the 8 minute mark.
Doubling the Recipe
This recipe scales beautifully for a crowd. When doubling, I suggest keeping the salt and leavening agents at about 1.75x rather than a full 2x to avoid a chemical aftertaste. You will likely need to bake in batches.
Never put a fresh tray of dough onto a hot baking sheet let the sheets cool down completely first, or the bottoms of your second batch will melt before they even get into the oven.
| Servings | Dough Ball Size | Pan Size | Total Cook Time |
|---|---|---|---|
| 12 Servings | 1.5 tbsp | 1 Large Sheet | 10 minutes |
| 24 Servings | 1.5 tbsp | 2 Large Sheets | 20 minutes (in batches) |
| 48 Servings | 1.5 tbsp | 4 Large Sheets | 40 minutes (in batches) |
If you are making a massive batch for a holiday, you can actually scoop all the dough onto a tray, freeze them until solid, and then bag them up. You can bake them straight from frozen; just add 2 minutes to the timer.
It’s a great way to always have "emergency" cookies ready for unexpected guests.
Customizing Your Cookies with Creative Additions
While the classic is hard to beat, sometimes you want to dress things up a bit for a special event or a specific craving.
The Chocolate Lover's Version
It is no secret that chocolate and peanut butter are the ultimate pairing. You can fold in 1/2 cup of semi sweet chocolate chips at the very end. Or, for a truly decadent finish, you can top each cookie with a chocolate kiss as soon as they come out of the oven.
The residual heat will melt the bottom of the chocolate just enough for it to stick.
The Salted Caramel Twist
If you want something a bit more sophisticated, add a small thumbprint to the center after the fork press and fill it with a tiny dollop of salted caramel. As the cookie bakes, the caramel will bubble and set into a chewy, sticky center.
This version is fantastic when you're looking for something that feels more like a "dessert" than a simple cookie.
Finishing with Frosting
If you're feeling particularly extra, you can sandwich two cookies together with a thin layer of my buttercream frosting recipe. It turns a humble bake into a sandwich cookie that rivals anything you'd find at a high end bakery. Just make sure the cookies are completely cold before you even think about adding frosting, or you'll end up with a melted mess.
Debunking Cookie Myths in the Kitchen
There is a lot of "conventional wisdom" out there that actually hurts your baking more than it helps. Let's clear up a few things.
- The "Natural" Peanut Butter Myth: People often think natural, stir style peanut butter is better for you, so it must be better for baking. Actually, the lack of stabilizers in natural peanut butter often leads to cookies that are oily and crumbly. For this specific recipe, the "processed" stuff provides the structural integrity you need.
- The Sifting Myth: You don't need to sift your flour for cookies. While it’s great for delicate sponges, a simple whisking of the dry ingredients is more than enough to aerate and combine them for a rustic cookie.
- The Over Creaming Myth: Some people think you can't over cream butter and sugar. While it's hard to do by hand, a high powered mixer can actually break down the fat structure if left too long, leading to cookies that collapse. Three to four minutes is the sweet spot.
Storing and Freezing for Freshness Later
Since this recipe yields 24 cookies, you might not eat them all in one sitting (though I won't judge if you try!).
Pantry and Fridge Storage
Once the cookies are completely cool, store them in an airtight container at room temperature. They will stay fresh and soft for about 4 to 5 days. If you find they are starting to get a little firm, popping a single slice of white bread into the container will help them reclaim some moisture the cookies will literally "drink" the humidity from the bread.
Zero Waste Tips
If you have leftover crumbs or a few cookies that got a bit too crunchy, don't toss them! I love to crush up older cookies and use them as a topping for vanilla ice cream or fold them into a cheesecake crust.
You can even pulse them in a food processor to create a "peanut butter sand" that makes a spectacular base for a pie.
For the freezer, these are a dream. You can freeze the baked cookies for up to 3 months. Just make sure they are well wrapped to prevent freezer burn. When the craving hits, just 10 seconds in the microwave will bring back that "just baked" warmth and soften the fats perfectly.
Perfect Pairings for Your Warm Peanut Butter Treats
There is something inherently comforting about the way a peanut butter cookie interacts with other flavors. While a tall glass of cold milk is the traditional choice, I think these cookies really shine when paired with a sharp, hot drink.
The richness of the peanut fat coats the palate, and a bitter espresso or a strong black tea cuts right through that, cleaning your taste buds for the next bite.
If you are serving these as part of a larger spread, they look beautiful stacked on a rustic wooden board next to some sliced apples or grapes. The fruit provides a fresh, acidic counterpoint to the heavy, nutty flavor of the bake.
Whether you're sharing them at a family reunion or hoarding them for your own midnight snack, these cookies are a reminder that sometimes the simplest recipes are the ones that stick with us the longest. Happy baking!

Recipe FAQs
Is there a specific Snoop Dogg recipe for these cookies?
No, this recipe is distinct from any celebrity endorsed version. We prioritize specific creaming techniques to build structure, which helps you learn how fat-to-sugar ratios affect final results a foundational skill also used in our sugar cookies recipe.
Are there only three ingredients in peanut butter cookies?
No, that is a common misconception. While some versions rely on minimal ingredients, this recipe uses ten, including butter, flour, and leavening agents, to ensure a professional, consistent texture.
Are these cookies suitable for diabetics?
No, they are not. This recipe contains significant amounts of both granulated white sugar and light brown sugar, which makes them unsuitable for a diabetic diet.
What are good add-ins for these cookies?
Stick to the original ingredient list for the best results. Adding extra components can disrupt the delicate balance of fat and flour, potentially causing the dough to spread incorrectly or bake unevenly.
How to prevent cookies from spreading too thin?
Chill the dough in the refrigerator for 20 minutes before baking. This step solidifies the butter, which prevents the cookies from flattening out too quickly when they hit the heat of the oven.
How to achieve the perfect texture?
Cream the butter and sugars for at least 3 minutes until pale and fluffy. Aerating the fat is essential for creating the right crumb structure, ensuring your cookies are neither too dense nor overly brittle.
How to know when the cookies are done?
Remove them from the oven exactly at 10 minutes when the edges are mahogany brown. Even if the centers appear slightly soft, they will continue to firm up perfectly while resting on the hot baking sheet for 5 minutes.
Classic Peanut Butter Cookies

Ingredients:
Instructions:
Nutrition Facts:
| Calories | 140 calories |
|---|---|
| Protein | 3g |
| Fat | 8g |
| Carbs | 15g |
| Fiber | 1g |
| Sugar | 9g |
| Sodium | 112mg |
