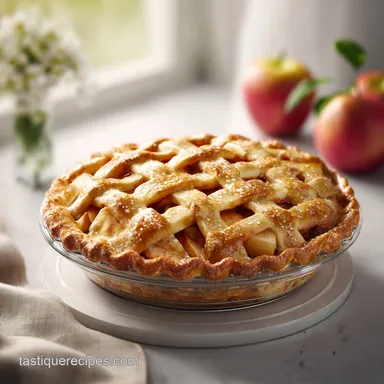
Classic Apple Pie: Crisp Crust and Jammy Filling

- Time: Active 45 minutes, Passive 55 minutes, Total 100 minutes
- Flavor/Texture Hook: Shatteringly flaky crust with a thick, cinnamon spiked apple center
- Perfect for: Holiday gatherings, rustic Sunday bakes, or impressing fellow pie enthusiasts
- Mastering This Classic Apple Pie Recipe
- Why This Works
- Ingredient Deep Dive
- Necessary Tools For Flaky Crusts
- The Full Baking Instruction Guide
- How To Solve Pie Problems
- Personalizing Your Homemade Apple Pie
- Myths About Apple Pie
- Storage and Freezing Made Simple
- The Best Sides And Drinks
- Recipe FAQs
- 📝 Recipe Card
Mastering This Classic Apple Pie Recipe
Imagine walking into a house where the air is thick with the scent of toasted butter, sharp cinnamon, and the sweet tart tang of cooked fruit. That scent is the essence of American hospitality, rooted in a tradition that spans centuries.
While apple pie is often called "as American as," its origins actually trace back to England, the Netherlands, and France. It was early settlers who brought the seeds across the ocean, turning wild crabapples into the heritage varieties we cherish today.
For me, making an apple pie is a quiet, meditative act of rustic baking that connects us to those original home cooks who had to make everything from scratch using just their hands and a cold larder.
We aren't just making a dessert here, we're building a structural masterpiece that balances fat, flour, and fruit. The goal is a crust that shatters when your fork hits it, rather than a doughy or tough shell.
Many people struggle with a soggy bottom or a filling that’s too watery, but those are easy fixes once you understand how the ingredients interact. I remember my first few pies were a bit of a mess, with the juice running everywhere like a soup, but I've learned that patience and a few specific techniques make all the difference.
In this guide, we'll walk through a step-by-step apple pie recipe that focuses on the "why" as much as the "how." We're going to use simple, honest ingredients, but we'll treat them with the respect they deserve.
Whether you are using a standard all purpose flour or experimenting with some of my favorite heritage grains like einkorn or a bit of spelt for a nuttier flavor, the principles remain the same. This is about creating something that looks as good as it smells and tastes even better.
Why This Works
- over High heat Sealing: Starting the bake at 425°F (218°C) causes the water in the butter to evaporate instantly, creating steam pockets that lift the dough into flaky layers.
- Enzymatic Control: The lemon juice isn't just for tang, it lowers the pH to slow down the browning of the fruit and keeps the apple slices from turning into mush.
- Starch Gelatinization: Allowing the apples to macerate with sugar and cornstarch creates a thick syrup that coats every slice, ensuring the filling stays put when sliced.
- Lamination Effect: Keeping butter in "pea sized" chunks ensures that fat remains separate from the flour until it melts in the oven, creating that characteristic "shatter" texture.
| Method | Time | Texture | Best For |
|---|---|---|---|
| Stovetop Pre cook | 15 mins | Very soft, consistent | Preventing "the gap" in deep dishes |
| Oven (Traditional) | 55 mins | Firm slices, fresh bite | This recipe; classic rustic texture |
| Slow Cooker | 4 hours | Compote like, no crust | Apple butter or crustless fillings |
Choosing the oven method, as we do here, allows the apples to slowly release their pectin, which naturally thickens the sauce as it bubbles. Pre cooking on the stovetop is a valid shortcut for some, but you lose that beautiful, structured bite that makes a traditional pie feel so hearty.
The oven also provides the dry heat necessary to transform the raw dough into a golden, mahogany masterpiece.
Ingredient Deep Dive
The quality of your flour and fat determines the soul of your crust. I often talk about rustic baking because I love using specialty flours that haven't been over processed. If you want to experiment, you could swap out half a cup of the all purpose flour for a heritage grain like einkorn. It adds a subtle honey like aroma that pairs beautifully with the apples. If you're interested in how different doughs handle, you might find the texture of my Korean Sweet Potato Bread a fascinating comparison, as it uses different starches to achieve a chewy rather than flaky result.
| Ingredient | Science Role | Pro Secret |
|---|---|---|
| Chilled Butter (1 cup) | Provides steam for lift | Freeze the cubes for 10 mins before mixing to keep them distinct |
| Cornstarch (2 tbsp) | Binds fruit juices | Mix with the sugar first to prevent clumps in the filling |
| Granny Smith Apples | Provides structure/acid | Always mix with a sweeter apple like Honeycrisp for flavor balance |
| Lemon Juice (1 tbsp) | Prevents oxidation | Also cuts the sweetness of the brown sugar for a brighter finish |
One thing most people skip is the salt. Use a fine sea salt rather than table salt. It dissolves faster and highlights the sweetness of the apples. If you use unsalted butter, that teaspoon of salt is non negotiable.
It’s the difference between a crust that tastes like "bread" and a crust that tastes like "pastry."
Necessary Tools For Flaky Crusts
You don't need a kitchen full of gadgets, but a few specific items make the process much smoother. A glass pie plate is my top recommendation. Why? Because it lets you look at the bottom of the pie. There is nothing worse than thinking a pie is done because the top is brown, only to find a pale, raw bottom.
With glass, you can see if that mahogany color has reached the very base.
A pastry blender is helpful, but honestly, your fingers are the best tools you have. You can feel the temperature of the butter and ensure you aren't overworking the dough. If your hands are naturally warm, rinse them in ice water and dry them before you start.
This keeps the butter from melting into the flour, which is the number one cause of a tough, cracker like crust.
Chef's Tip: If you find your crust edges browning too quickly, don't buy a fancy shield. Just cut a circle out of the center of a square of aluminum foil and lay the "frame" over the edges. It’s a budget friendly fix that works every time.
The Full Baking Instruction Guide

- Prepare the dough. In a large bowl, pulse 2.5 cups all purpose flour and 1 tsp salt. Add 1 cup chilled, cubed butter. Note: Work quickly so the butter stays cold.
- Hydrate the mixture. Add 7 tbsp ice water, one tablespoon at a time, until it holds when squeezed. Wait until it just clumps together.
- Chill the disks. Divide dough into two equal disks, wrap in plastic, and chill for 1 hour. Note: This relaxes the gluten and prevents shrinking.
- Macerate the apples. Toss 1.2 kg sliced apples with 0.75 cup sugar, 0.25 cup light brown sugar, 2 tbsp cornstarch, 1.5 tsp cinnamon, 0.25 tsp nutmeg, and 1 tbsp lemon juice. Let sit for 30 minutes. Look for the liquid pooling at the bottom.
- Preheat and prep. Set oven to 425°F (218°C). Place a baking sheet on the middle rack to catch drips.
- Roll and fit. Roll one disk to 12 inches and fit into a 9 inch deep dish plate. Fill with apples, packing them tightly.
- Top and seal. Dot apples with 2 tbsp butter. Roll out the second disk, place on top, trim, and crimp. Cut vents in the top.
- Wash and sparkle. Whisk 1 egg with 1 tbsp water. Brush over the crust and sprinkle with 1 tbsp coarse sugar. Ensure the entire surface is coated.
- Initial over high heat bake. Bake at 425°F for 20 minutes. Watch for the crust starting to puff and pale gold color.
- Finish the bake. Lower heat to 375°F (190°C) and bake for 35-40 minutes. Remove when the filling is thick and bubbling through the vents.
- Cooling phase. Rest on a wire rack for 3 hours. Note: This is the hardest part, but it's vital for a clean slice.
Macerating the Fruit for Stability
Allowing the apples to sit with the sugar for 30 minutes is the step most people skip, but it's essential for this apple pie recipe. During this time, the sugar draws out the excess moisture from the cells of the apple.
If you don't do this, that water will release inside the oven, creating a "soup" that prevents the bottom crust from crisping up. By macerating first, you're ensuring that the cornstarch can bond with that liquid immediately, turning it into a thick, velvety glaze.
Achieving the Mahogany Glow
The transition from a pale tan to a deep mahogany brown is where the flavor lives. That color comes from the egg wash and the sugars in the crust caramelizing. Don't be afraid of a dark crust. A dark crust is a cooked crust. If you pull the pie too early, the interior layers of the pastry will be "mealy" instead of "flaky." Trust the 55 minutes total bake time. If you’re worried about the scent of another bake, like my Matcha Almond Muffins, remember that the deep spices of an apple pie will always dominate the kitchen in the best way possible.
How To Solve Pie Problems
Managing a Soggy Bottom
The dreaded "soggy bottom" happens when the oven heat doesn't reach the bottom of the pie fast enough to sear the dough before the fruit juices start to soak in. To prevent this, we preheat a baking sheet inside the oven.
When you place your pie plate directly onto that hot metal sheet, it gives the bottom crust an immediate blast of heat, sealing the pastry and creating a barrier.
| Problem | Root Cause | Solution |
|---|---|---|
| Crust Shrunk | Dough wasn't chilled | Rest the dough for at least 1 hour before rolling |
| Filling is Runny | Not enough cooling time | Let the pie sit for the full 3 hours to let starch set |
| Gap Under Top Crust | Fruit settled during bake | Slice apples 1/4 inch thick and pack them tightly |
Common Mistakes Checklist
- ✓ Forgetting to chill the butter: If the butter melts before it hits the oven, you lose all flakiness.
- ✓ Over handling the dough: The heat from your hands can ruin the texture; use a light touch.
- ✓ Using only one type of apple: A mix of Granny Smith and Honeycrisp provides both tartness and sweetness.
- ✓ Skipping the vents: Steam needs to escape, or the top crust will become soggy from the inside out.
- ✓ Slicing too early: If you cut into a hot pie, the filling will run everywhere. Patience is an ingredient.
Personalizing Your Homemade Apple Pie
While this is an easy homemade apple pie recipe, you can certainly make it your own by tweaking the crust or the spices. If you like a bit of a crunch on top, you can turn this into a homemade apple pie with crumble topping by replacing the top crust with a mix of oats, flour, butter, and brown sugar.
However, for the classic experience, sticking to the double crust method is the way to go. It traps the steam and essentially "confit" the apples in their own juices.
Scaling and Adjustments
If you need to make a smaller pie for a small household, you can cut this recipe in half and use a 6 inch pie tin. For the dough, beat one egg and use half for the egg wash, or just use a bit of milk. When scaling down, reduce the baking time by about 20% and start checking for doneness around the 40 minute mark total.
If you are scaling up for a big party, don't just double the spices. Spices can become overwhelming when doubled exactly. Use about 1.5 times the cinnamon and nutmeg if you are making two pies. For the liquids, you can usually keep the measurements the same per pie.
Working in batches is better than trying to make a massive bowl of dough, as it’s easier to keep the butter cold in smaller quantities.
| Servings | Ingredient Adjustment | Pan Size | Cook Time |
|---|---|---|---|
| 4 People | 0.5x Ingredients | 6 inch deep dish | 45 minutes |
| 8 People | 1x Ingredients | 9 inch deep dish | 55 minutes |
| 16 People | 2x Ingredients | Two 9 inch dishes | 60 minutes |
Myths About Apple Pie
One common misconception is that you need to use "pie apples" like Northern Spy exclusively. While they are great, the best classic apple pie recipe is often made with a mix of what is available at your local market. The key is the balance of acid and sugar.
Another myth is that you must use a food processor for the dough. While it’s fast, many old fashioned apple pie recipe purists argue that the blades cut the butter too finely. Doing it by hand gives you those irregular "shards" of butter that lead to the most dramatic flakes.
Searing the apples beforehand is another point of contention. Some say it’s necessary to prevent the gap under the crust, but our maceration step achieves the same goal without the extra pans to wash.
The sugar draws the water out, the apples shrink slightly before they enter the crust, and you get a dense, well packed filling every time.
Storage and Freezing Made Simple
If you find yourself with leftovers, this simple apple pie recipe keeps surprisingly well. You can leave it on the counter, covered loosely, for about 2 days. For longer storage, put it in the fridge for up to 5 days.
To regain that crispness, always reheat in the oven at 350°F (180°C) for about 10 minutes rather than using the microwave, which will make the crust rubbery.
For the zero waste enthusiasts, don't throw away those apple peels and cores! You can simmer them with a bit of water, sugar, and a cinnamon stick to make a quick apple jelly or a concentrated syrup for cocktails and sodas.
The butter wrappers can be used to grease pans for future bakes, and any leftover scraps of dough can be sprinkled with cinnamon sugar and baked as "pie fries" for a quick snack.
The Best Sides And Drinks
When it comes to serving, a warm slice of pie is a canvas. The traditional choice is a scoop of high-quality vanilla bean ice cream, creating the classic "pie à la mode." The way the cold cream melts into the warm cinnamon syrup is truly special.
If you want something a bit more rustic, a sharp cheddar cheese slice on the side is a traditional New England pairing that highlights the savory notes in the crust.
For drinks, a hot cup of black coffee or a spicy chai tea complements the nutmeg and cinnamon beautifully. If you're serving this at a dinner party, a glass of tawny port or a sparkling hard cider can bring out the brightness of the Granny Smith apples.
No matter how you serve it, this quick apple pie recipe is about bringing people together over something handmade, honest, and comforting. Enjoy the process, and don't worry if your crimping isn't perfect it just adds to the rustic charm.

Recipe FAQs
What's the secret to a great apple pie?
The secret is using both Granny Smith and Honeycrisp apples. This specific blend ensures a perfect balance of tartness and structure that holds up during the 55-minute bake time.
Should I cook apples before putting in pie?
No, do not cook the apples beforehand. Instead, toss your sliced fruit with sugar, cornstarch, and spices, then let the mixture macerate for 30 minutes to draw out excess moisture before filling your crust.
What are common apple pie mistakes?
Overworking the dough and forgetting to chill your butter are the biggest culprits. If your hands melt the butter during the mixing process, the crust will lose its signature flakiness and become tough.
How do you keep the bottom crust of apple pie from getting soggy?
Place a preheated baking sheet on the middle oven rack before sliding your pie inside. This direct heat transfer helps set the bottom crust quickly, ensuring it stays crisp rather than absorbing juices.
How to properly cool the pie after baking?
Cool the pie on a wire rack for at least 3 hours. Patience is a vital ingredient here, as this duration allows the cornstarch thickened juices to fully set, ensuring your slices hold their shape perfectly.
Is it true I should slice the pie as soon as it leaves the oven?
No, this is a common misconception. Cutting into a hot pie will cause the filling to run out completely; if you enjoyed mastering the patience required for timing here, apply that same discipline to letting your pie rest.
How to reheat leftover pie while maintaining crust texture?
Reheat in the oven at 350°F for about 10 minutes. Avoid the microwave at all costs, as it will inevitably turn your crisp, flaky crust into a soft, rubbery texture.
Classic Homemade Apple Pie
Ingredients:
Instructions:
Nutrition Facts:
| Calories | 568 kcal |
|---|---|
| Protein | 6g |
| Fat | 27g |
| Carbs | 79g |
| Fiber | 4g |
| Sugar | 42g |
| Sodium | 295mg |
