Best Chicken Parmesan Recipe
- Time: Active 20 minutes, Passive 20 minutes, Total 40 minutes
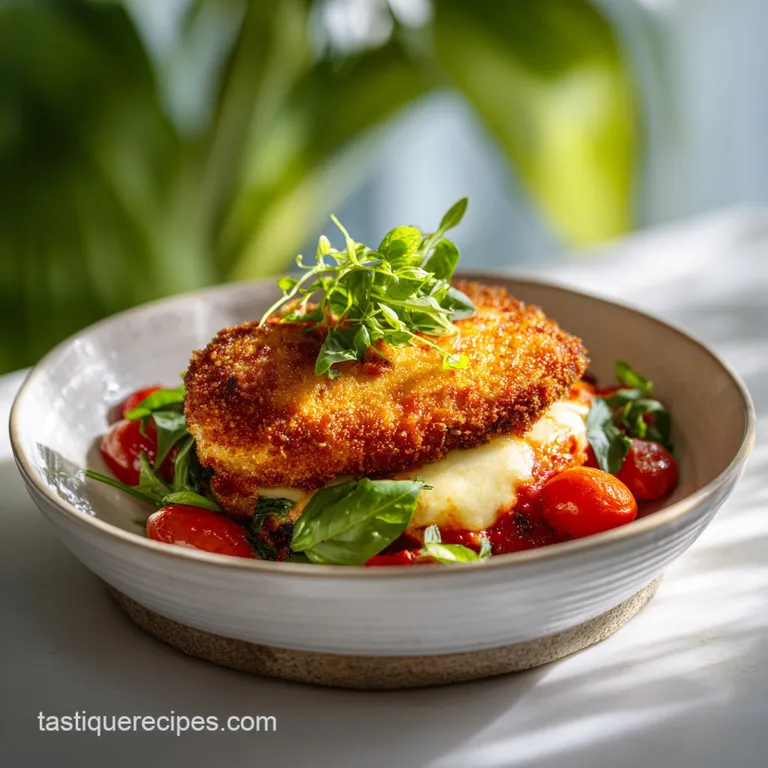
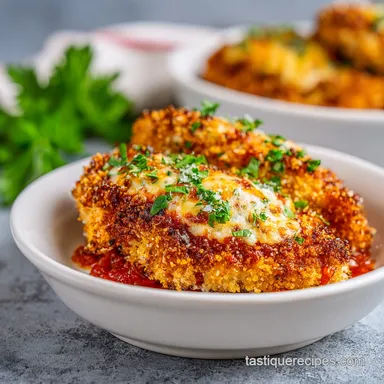
- Flavor/Texture Hook: A shattering panko crust meeting velvety molten mozzarella
- Perfect for: High impact weeknight dinners or impressing guests with a classic
- How to Master This Crispy Chicken Parmesan Recipe
- The Science Behind a Perfectly Crispy Crust
- Essential Precision Metrics for a Golden Finish
- Selecting the Best Components for Peak Flavor
- The Right Tools for a Restaurant Quality Meal
- Step-by-Step Guide to the Ultimate Italian Classic
- Fixing Common Errors for a Flawless Result
- Creative Ways to Adapt Your Signature Dish
- Maintaining Freshness and Reheating for Best Texture
- The Best Side Dishes for This Hearty Meal
- High in Sodium
- Recipe FAQs
- 📝 Recipe Card
How to Master This Crispy Chicken Parmesan Recipe
The thud thud thud of my heavy rolling pin hitting the counter is usually the first sign that dinner is going to be something special. I remember the first time I tried making this chicken parmesan recipe for my family; I was so focused on the marinara that I let the chicken sit in the sauce until it turned into a soggy, sad mess.
It was a texture tragedy, honestly. My kitchen smelled like a dream, but the actual bite was a mushy disappointment that left me determined to fix the process.
After years of tinkering with breading ratios and frying temperatures, I finally discovered the secret to that restaurant style "shatter" that holds up even under a blanket of mozzarella. It’s all about the moisture barrier and the heat management.
You want that sizzle the moment the meat hits the pan, followed by a quick trip to the oven to melt the cheese without overcooking the protein. We've all had that rubbery, over baked chicken before but not today. Let’s get into the details that actually make a difference.
The Science Behind a Perfectly Crispy Crust
The Hydration Barrier: Flour absorbs surface moisture from the chicken, creating a dry protein starch "glue" that prevents the breading from slipping off during the over high heat sizzle of the pan.
Panko Porosity: Unlike standard breadcrumbs, Panko's large, jagged surface area creates air pockets that allow steam to escape, preventing the crust from becoming a wet paste.
Proteolytic Pounding: Pounding the chicken to exactly 1/2 inch breaks down tough connective tissues and ensures the heat travels through the meat at a uniform rate, preventing the edges from drying out while the center cooks.
The Physics of the Golden Shatter
When the cold chicken hits the 350°F oil, the moisture on the surface evaporates almost instantly. This creates a protective "steam wall" that prevents the oil from soaking into the meat, ensuring the crust stays light rather than greasy.
Why the Wire Rack is Essential
Elevating the chicken on a wire rack after frying allows air to circulate around the entire piece. If you place a hot, fried cutlet directly onto a flat plate, the residual steam gets trapped underneath, which is the fastest way to ruin a crispy exterior.
The Role of Carryover Cooking
We pull the chicken from the pan when it looks golden, but the internal temperature continues to rise during the oven melting stage. This "carryover" is what keeps the breast meat juicy rather than chalky.
| Cooking Metric | Stovetop Searing | Oven Finishing | Visual Cue |
|---|---|---|---|
| 1/2 inch thickness | 3 minutes per side | 5-7 minutes | Deep golden brown |
| 1 inch thickness | 5 minutes per side | 10-12 minutes | Pale gold with juices |
| 1/4 inch thickness | 2 minutes per side | 3-4 minutes | Dark brown edges |
Essential Precision Metrics for a Golden Finish
To get this chicken parmesan recipe right every single time, you need to hit these three precision checkpoints. First, your chicken must be pounded to a uniform 1/2 inch thickness no exceptions.
Second, your oil needs to hit 350°F before the first cutlet enters the pan; if it’s too cold, the breading will drink the oil. Third, the internal temperature of the chicken should reach exactly 165°F after the cheese has melted in the oven.
If you’re looking for a meatless version of this texture, my Bang Bang Cauliflower recipe uses a similar over high heat approach to keep things crisp.
| Method | Total Time | Texture | Best For |
|---|---|---|---|
| Stovetop Only | 15 minutes | Maximum crunch, less melty | Quick lunch/Sandwiches |
| Oven Only | 25 minutes | Softer crust, very juicy | Hands off meal prep |
| Hybrid (Our Way) | 20 minutes | Shattering crust, molten cheese | Ultimate dinner quality |
Selecting the Best Components for Peak Flavor
The magic of this recipe lies in the contrast between the sharp Parmesan and the mild, stretchy mozzarella. I always tell my friends that if you use the pre shaken "green can" cheese, you're missing out on the essential fats that help the crust brown.
The Molecular Makeup of Your Ingredients
| Ingredient | Science Role | Pro Secret |
|---|---|---|
| Panko Breadcrumbs | Moisture resistant structure | Pulse half in a blender for a multi textured "fine and coarse" crust |
| Parmesan Cheese | Salt fat flavor profile | Use 24 month aged for a higher umami hit that seasons the meat |
| Fresh Mozzarella | Moisture and elasticity | Pat dry with paper towels to prevent "whey puddles" on your chicken |
| Neutral Oil | High smoke point | Grape seed or Avocado oil allows for a cleaner flavor than olive oil |
The Right Tools for a Restaurant Quality Meal
You don't need a professional kitchen, but a few specific pieces of gear will make your life much easier. A heavy bottomed skillet, preferably cast iron or stainless steel, is non negotiable for even heat distribution.
If your pan is too thin, you'll get hot spots that burn the breading while the chicken stays raw in the middle.
- Meat Mallet: For achieving that perfect 1/2 inch thickness across the entire breast.
- Shallow Breading Trays: Makes the "Standard Breading Procedure" much less messy.
- Instant Read Thermometer: The only way to guarantee juicy chicken without guessing.
- Wire Cooling Rack: Placed over a baking sheet to keep the bottom of the chicken crisp.
Chef's Tip: If you don't have a meat mallet, use a heavy skillet or a rolling pin. Just be sure to place the chicken between two sheets of plastic wrap first to prevent tearing the meat fibers.
step-by-step Guide to the Ultimate Italian Classic

This process moves fast once the chicken hits the pan, so have your "mise en place" (everything in its place) ready. I often serve this alongside my Weeknight Tofu Stir recipe when I'm doing a fusion style meal prep week because both require focused pan searing techniques.
- Prep the Protein: Place 2 Large Boneless Skinless Chicken Breasts between plastic wrap. Pound to a uniform 1/2 inch thickness. Note: This ensures the meat cooks at the same speed as the breading browns.
- Station One: Place 1/2 cup All Purpose Flour in a shallow bowl. Season with a pinch of salt and pepper.
- Station Two: Whisk 2 Large Eggs with 1 tbsp water in a second bowl until no streaks of yolk remain.
- Station Three: Combine 1 cup Panko Breadcrumbs, 1/2 cup Finely Grated Parmesan Cheese, 1 tsp Garlic Powder, 1 tsp Dried Oregano, 1 tsp Kosher Salt, and 1/2 tsp Freshly Cracked Black Pepper.
- Dredge: Coat chicken in flour, shaking off the excess. Dip into egg wash, then press firmly into the Panko Parmesan mix until every nook and cranny is covered.
- Sizzle: Heat 1/2 cup Neutral Oil in a skillet over medium high heat. Fry chicken for 3-4 minutes per side until deep golden and crackling.
- Drain: Move the chicken to a wire rack for 2 minutes. Note: This prevents the bottom from getting soggy while you prep the sauce.
- Top: Spread 2 tablespoons of high-quality Marinara Sauce on each cutlet. Place 2 oz of Fresh Mozzarella on top of each.
- Bake: Place in a 400°F oven for 5-7 minutes until the cheese is bubbling and slightly browned.
- Garnish: Remove from oven and top with 1/4 cup Fresh Basil Leaves and a sprinkle of Extra Parmesan.
Fixing Common Errors for a Flawless Result
We’ve all been there the breading falls off in one giant sheet, or the chicken is bone dry. Most of these issues come down to temperature or moisture control. If your breading is sliding, it usually means the chicken was too wet before the flour stage, or you didn't press the crumbs in hard enough.
Why Your Crust is Falling Off
The most common culprit is "steam off." If the chicken is cold and the pan isn't hot enough, the internal moisture turns to steam and pushes the crust away from the meat. Ensure your chicken sits at room temperature for 15 minutes before cooking.
| Problem | Root Cause | Solution |
|---|---|---|
| Soggy Bottom | Trapped steam | Rest chicken on a wire rack, never a flat plate or paper towel |
| Burnt Crust/Raw Center | Heat too high | Lower heat to medium and use a thermometer to check for 165°F |
| Breading Not Sticking | Excess moisture | Pat chicken completely dry with paper towels before starting the flour dredge |
Common Mistakes Checklist
- ✓ Forgeting to shake off excess flour (creates a thick, gummy layer)
- ✓ Crowding the pan (drops the oil temperature and leads to steaming)
- ✓ Using cold marinara (this chills the chicken and makes the cheese take longer to melt)
- ✓ Using "woody" chicken breasts (large, tough breasts won't tenderize well)
- ✓ Skimping on the oil (shallow frying requires enough fat to surround the edges of the crust)
Creative Ways to Adapt Your Signature Dish
Once you've mastered the basic chicken parmesan recipe, you can start playing with the flavor profiles. I sometimes swap the oregano for Shichimi Togarashi if I want a spicy, Asian inspired kick, or use a mix of Gruyère and Mozzarella for a nuttier, richer cheese pull.
Decision Shortcut
- If you want Maximum Crunch: Use 100% Panko and skip the oven finish; just melt the cheese under a broiler for 60 seconds.
- If you want Traditional Softness: Use Italian breadcrumbs instead of Panko and let the chicken simmer in the sauce for 2 minutes before adding cheese.
- If you want Low Carb: Swap the flour/panko for a mix of almond flour and crushed pork rinds.
| Original Ingredient | Substitute | Why It Works |
|---|---|---|
| Panko Breadcrumbs | Crushed Crackers | Adds a buttery, salty depth. Note: Will brown much faster than Panko. |
| Fresh Mozzarella | Low Moisture Mozzarella | Melts more evenly and doesn't release water. Note: Less "velvety" texture. |
| Marinara Sauce | Vodka Sauce | Adds a creamy, acidic punch. Note: Makes the dish significantly richer. |
Maintaining Freshness and Reheating for Best Texture
Storing leftovers is easy, but reheating is where people usually fail. Whatever you do, stay away from the microwave! It will turn your beautiful crust into a rubbery mess.
Storage: Keep in an airtight container in the fridge for up to 3 days. If freezing, freeze the fried cutlets before adding the sauce and cheese. They will stay good for up to 2 months.
Reheating: The best way to revive the crunch is in an air fryer at 350°F for 4-5 minutes, or a toaster oven at 375°F for 8 minutes.
This re activates the fats in the crust and melts the cheese again without drying out the chicken.
Zero Waste Tip: If you have leftover breading mix (flour, egg, or crumbs), don't toss them! You can dredge thick slices of zucchini or eggplant in the leftovers for a quick side dish. Leftover marinara can be frozen in ice cube trays for future single serve pasta nights.
The Best Side Dishes for This Hearty Meal
Since this dish is quite rich and savory, I like to pair it with something bright and acidic to cut through the fat. A simple arugula salad with a lemon vinaigrette is my go to, but if you want the full Italian American experience, you can't go wrong with a side of pasta.
- Pasta: A classic spaghetti or linguine tossed in the remaining marinara.
- Garlic Bread: Use a baguette to soak up any extra sauce on the plate.
- Roasted Vegetables: Broccoli or asparagus with a squeeze of lemon and red pepper flakes.
- Wine Pairing: A high acid red like Chianti or Barbera balances the tomato sauce perfectly.
Trust me, once you hear that first "crunch" of the knife hitting the crust, you'll never go back to the standard way of making this. It's all about those small, technical wins that lead to a restaurant quality result right at your own table. Right then, let’s get cooking!

High in Sodium
985 mg mg of sodium per serving (43% of daily value)
The American Heart Association recommends limiting sodium intake to no more than 2,300mg per day for most adults.
Tips to Reduce Sodium in Your Chicken Parmesan
-
Lower Sodium Cheese-20%
Replace the regular Parmesan cheese (both in the breading and for garnish) with a low-sodium or reduced sodium Parmesan or another hard cheese with a naturally lower sodium content. This can significantly reduce the overall sodium.
-
Low-Sodium Marinara-20%
Use a low-sodium or no-salt added marinara sauce. Alternatively, make your own marinara sauce from scratch using fresh tomatoes and herbs, allowing you to control the sodium content entirely.
-
Reduce Added Salt-15%
Omit the 1 tsp of Kosher salt entirely, or reduce it to 1/2 tsp. Taste the dish after cooking and add a pinch more only if needed.
-
Homemade Breadcrumbs-10%
Prepare your own breadcrumbs from stale bread without added salt. Many store-bought panko breadcrumbs contain added sodium.
-
Herb Power!
Enhance the flavor with fresh herbs like basil, oregano, and parsley instead of relying on salt. Fresh herbs provide a bright, vibrant taste without adding sodium.
Recipe FAQs
What is the secret to good chicken Parmesan?
The secret is the texture contrast: a shattering crust under molten cheese. You must pound the chicken uniformly thin (1/2 inch) and use a double dredge to build a sturdy barrier. Mastering texture control here is vital; if you enjoyed controlling cookie spread here, see how the same fat ratio logic applies to our Sourdough Discard Scallion recipe for crust integrity.
What ingredients do you need for chicken Parmesan?
You need chicken breasts, flour, eggs, Panko breadcrumbs, grated Parmesan, seasonings, high-quality marinara sauce, and fresh mozzarella cheese. The high surface area of Panko is crucial for maximum crispness, resisting sogginess better than standard breadcrumbs.
What are common mistakes when making chicken parm?
The most common mistakes involve temperature control and moisture mismanagement. Crowding the pan drops the oil temperature, causing the crust to absorb oil instead of crisping, or failing to pat the chicken dry results in the breading sliding off during frying.
When making chicken Parmesan, do you put the sauce on first or the cheese?
Apply the sauce first, then layer the cheese on top of the sauce. The sauce acts as the glue securing the cheese to the crust, but putting the cheese directly on the hot, fried breading prevents the sauce from adequately warming through before the cheese melts.
How to ensure the chicken stays juicy after breading and frying?
Sear the cutlets quickly in oil heated to exactly 350°F, then finish in a moderate oven (400°F). This two-step process cooks the meat through without drying it out, utilizing carryover cooking to reach the final safe temperature while the cheese melts.
Is it true that frozen chicken cutlets can be used without thawing?
No, using frozen chicken breasts will result in an uneven crust and raw interior. The ice crystals in the meat release too much water when they hit the hot oil, immediately steaming the breading and causing it to separate from the protein.
Why does my melted mozzarella release too much water onto the plate?
This happens because fresh mozzarella contains excess whey that hasn't been pressed out. Before topping the chicken, thoroughly pat the mozzarella slices dry with paper towels to minimize the liquid released during the final bake.
Best Chicken Parmesan Recipe
Ingredients:
Instructions:
Nutrition Facts:
| Calories | 640 kcal |
|---|---|
| Protein | 49 g |
| Fat | 33 g |
| Carbs | 32 g |
| Fiber | 2.5 g |
| Sugar | 5.2 g |
| Sodium | 985 mg |
